Christmas Light Show
5000 ws2811 pixels all synced to Christmas Music broadcasting over a radio transmitter. Includes 8 150 pixel candy canes, 3 talking coro props, 12 vertical strips outlining the house, pixels lining both the upper and lower eaves, 3 arches, 3 misc. coro props, and more.
Created by
 civilizayden
Tier 1
46 views
0 followers
 alexren ⚡🚀
approved Christmas Light Show ago
alexren ⚡🚀
approved Christmas Light Show ago
Tickets awarded: 1125 tickets
Tier: 1
awesome job! sorry for the wait lol
civilizayden
added to the journal ago
Preparing for next year
I spent a day with my dad taking the show down and finding a place to store it. I also started planning out what I am going to add next year. I already ordered 5000 pixels from China to get them for cheap, and I prepared my layout for next year. I will be adding a megatree, four minitrees, matrixes in all of the upper windows and a HUGE snowflake (600 nodes and 6 ft tall). I will also be adding two DMX beams, which I will mount on the roof. I can't wait! 
 CAN ⚡🚀
submitted Christmas Light Show for ship review ago
CAN ⚡🚀
submitted Christmas Light Show for ship review ago
civilizayden
submitted Christmas Light Show for ship review ago
alexren ⚡🚀
requested changes for Christmas Light Show ago
hey there! This project is seriously cool and I would've loved to see it in real life. That being said, I'm going to be returning this as it's not quite fully shipped as a project!
this mainly has to do with the CAD files in your repo - onshape links are great but there should be a local copy of all files in the repository! links can go down at any time and it also helps with version matching
I would also include screenshots of the 3D modelled parts in the repository.
Tier: 1
CAN ⚡🚀
submitted Christmas Light Show for ship review ago
civilizayden
submitted Christmas Light Show for ship review ago
civilizayden
added to the journal ago
Added Files
I put all of my sequence files and Xlights layout folder in the Github Repo. To view, download Xlights (xlights.org) and choose the uploaded "layout and xlights config" folder as the show folder. Then, in sequencer, you can open each of the sequences to view them. Don't forget to render them if you want to play them back and see what they look like.

 NotARoomba 🚀
requested changes for Christmas Light Show ago
NotARoomba 🚀
requested changes for Christmas Light Show ago
You can upload the code files that are large through Github desktop! Other than that, awesome project!
civilizayden
submitted Christmas Light Show for ship review ago
civilizayden
added to the journal ago
Requested Changes Question
The project is not mostly code, most of the work went into the hardware, as Christmas light displays like this one is a hobby with a large community, so almost none of the software is mine (though I spent a lot of time improving programs over the summer). While a lot of the project was done before Blueprint, I only logged the hours since halfway through October (I was told that was okay as long as it was since Blueprint started), and have written everything in a google doc instead of the journals, which is why it seems hastily added. The parts I did software-wise were all of the intros, the layouts, the tune-to effects, effect mapping (most of the effects I found pre-timed, but had to map them to my specific display), and the connection to FPP. It is not code per se, but there was an awful lot of programming I had to do to get this work. I tried to upload them to Github, but it said they were all too large. Can I take a screen recording of all of the files and the Xlights layout instead? 
 zsharpminor ⚡
requested changes for Christmas Light Show ago
zsharpminor ⚡
requested changes for Christmas Light Show ago
hey - "I cannot provide the files that I used for the programming of my show, primarily for copyright reasons with the music, but also because some of my sequences were purchased, and therefore not my ip." we sadly cannot approve a tier 1 project like this without the code as it's mostly code-based, can you remove the copyrighted music and show your sources and what you copied at least? also this project seems to have been done before blueprint and added on hastily :/
civilizayden
submitted Christmas Light Show for ship review ago
civilizayden
added to the journal ago
More detailed journal with more accurate hours
Okay, I need to add more stuff to the journal, so I will just paste everything that I did here all at once because I was previously using a google doc, and don't have good pictures for a lot of the process. I also deleted the hours from the first journal and put them in here since I have a more accurate number now.
November 25th - 3 hours
Today I built a box for the candy canes. This box was kind of a pain. It had to handle 1200 pixels all by itself. I had to buy a 12V 50A power supply for this one (rather than the typical 12V 30A ones), and since the fuses on my controller board were only 5A each, I had to get an automotive fuse block, and wire that to the control board and pigtails. A lot of wiring and drilling plastic later, I had a completed box that I have dubbed,“the rat’s nest”. 
November 26 - 6 or 7 hours (I’m sorry, I had to)
If you watched the demo video, you will see that I have the coro props as characters playing out a sort of story to lead into the songs. On this day, I had my parents and younger brother record their voiceovers on my computer. On this day, I had also prepared the script that they would read, and it took a while to draft the script, balance the audio, and coordinate with all of them to get it all recorded.
November 27 - 10 hours
It is Thanksgiving day, and today is the day I went live. I spent the entire day finishing up the sequences, adding the radio station to the Tune-to sign, and working on the intros. Since I got everything recorded yesterday, I now need to edit everything together. I recorded everything in one large document in audacity, and with the way Xlights works, I need to separate all of that into separate files to go between each song. I spent many many hours editing things together in audacity, getting the timings right, making sure some audio wasn’t too loud, too quiet, and separating everything into different audio files. I exported this, and it was time to work on the Xlights side of things. I started by getting the lyric tracks down. I use this great tool called auto lyrics by lighting fanatics, which basically puts everything into an X-timing track, which can then be imported into Xlights. Once in Xlights though, everything is in one track for every single character. So, I had to go to every single time a character was talking and put the effect for specifically when they were talking, and when they were not talking, I had to have a different effect for their default closed-mouth state. This was a painstaking process, taking me several hours. After I finally got all of the talking coro props done, I was able to work on the background sequence. I went onto the Xlights share drive and found some nice background sequences that I was able to use for free to make it so the show wasn’t just black when the coro props were talking between the songs. After I got all this done, it was time for Thanksgiving dinner, so I finally uploaded everything to my raspberry pi and hoped that it would work. There were still a few things I needed to fix, but it was good enough to show my family and we all had a great time watching my project come to completion.
Other days (These were done concurrently, so I would work on one for a few hours and then work on the next thing so I didn't get bored):
Rebuilt boxes - 4.5 hours
All of the control boxes that I have made up until this point we’re very painstakingly done. I had very short wires, and it was a pain to service and was slowly breaking the solder off of the control boards. I had to spend about half an hour per box (I had to do 9 of these) soldering longer wires to the pigtails, reconnecting it to the controller, and altogether making them easier to service in the future and the event of failures.
Made cables 9.5 hours
I had so many cables that I needed to make. If you look at the demo, I have around 38 props that have wires going to them, and because I changed my system from last year, each of those props needed a new wire made. I went through 200 feet of wire and spent around 15 minutes per wire getting all of these made. This took a few days in it of itself, and was a very repetitive and annoying process. I had to first strip the wire at both ends, strip the pigtails, get out my heat shrink solder sleeves, attach them to all three of the wires at both ends (so six of them), use the heat gun to melt them together, then cover everything up with heat shrink.
Hang all coro props - 9 hrs
In order to get all the core props on my house, there was a lot I needed to do. From last year, I found the best way to mount them was using PEX tubing, eye hooks, and white paracord. My dad and I had to go up on the roof, drill all of the eye hooks into the roof, cut the paracord to the correct length, cut the PEX to the correct length, Zip tie the PEX to the coro prop, run the paracord through the core prop, and tie it through the eye hook. All of that for one prop. Then we had to do that five more times.
Passthrough - 3 hours
There were a lot of cables that I needed to run out of my garage next to the main controller board to the roof and surrounding area. Last year, I just drilled a hole for each cord that I needed, however, this was not sustainable. Therefore, I had to drill out all of the holes that I had previously drilled into one big hole, then put a pass-through box on top of that big hole so that it can be covered during the off-season. Finally, I repaired the wires that I broke during this process and ran them out to where they needed to go.
Installation - 15 hours
This was the easy part, and by the easy part, I mean the part that we had done before. I had to get out all of my props, PVC window frames, garage, outlines, and mounting hardware from the attic. Then I had to sort through the mess I had created and figure out where everything went because I did a terrible job labeling everything last year. Then, I once again enlisted my dad‘s help putting everything up with the systems that I had in place from last year. This took the whole day, and half of the next one. I also had to repair all of the broken 3-D printed C9 covers from last year. On top of that, this involved getting the ladder out and mounting up all of the verticals that I had created during the summer with zip ties and securing them with stakes or weights on the ground.
Designed, 3D printed, and assembled window frame mounts - 10 hours
This part was fun, because it involved more CAD and 3-D printing, which is what I really enjoy. I went through a few iterations, but finally ended up on a 45° version to get the angle with the magnet just right to hold the window frames where they needed to go. I also had to make a separate version that was slightly shorter for the window frame on the far left of the house. After I got the design done, I had to go dig out the window frames from underneath the trailer in the fourth car garage, figure out which was which, and mount them. Mounting them involved going up on the ladder, using isopropyl alcohol to clean the edge of the window frames, sticking the magnet pad onto the window frames after it was painted, bringing the window frames up the ladder, and sticking the magnet mounts snapped onto the window frames to the magnet pads.
Troubleshooting- 11 hours
This caused me much pain. The first major error that I had was pixels, not lining up and everything being a mess of broken data. It took me a couple hours of testing boxes, testing, wires, and testing coral props to realize that this was a software problem. I then realized that I forgot to enter the correct pixel counts for several of the props, leading to the problems I described above. After that, the problems kept coming. For example, for some reason, the candy canes would not light up when I turned some of them on, but the others would turn on. I just messed around with the ports a bit, and ended up working. Same with the tune to sign and arches. Other things that I had to fix included flipped props (upside down in the software), nonfunctioning cables I had to swap out, and flickering props. I found out that the whole left side of the house flickers, but that was only because the garage was open, creating an interference chamber with the radio transmitter. I fixed that simply by closing the garage door for my testing. Another problem was the right window frame on the roof was flickering. This was a data issue, since it was plugged into the window frame next to it instead of directly to the box. Since it was such a long run from this area, I had to get a third box up on the roof, configure the switches within the controller, and then do a lot of software balancing to get the pixels per port right, and then I had to plug everything in.
 1mon ⚡
requested changes for Christmas Light Show ago
1mon ⚡
requested changes for Christmas Light Show ago
please continue your journal so you have more info on how you designed this project! all work needs to be journaled! you alos need cart screenshots so we know where the grant will be going
civilizayden
submitted Christmas Light Show for ship review ago
civilizayden
added to the journal ago
Worked on projector
I used an old chemical bin and a Dremel to cut holes in it to make a nice box for my projector. However, I was unable to get it working tonight since it is just not bright enough with the street light. I did however get it to work on my computer monitor so I know that it will work once I can get a sheet big enough to cover my garage.
I will update this project with the projector once I get the necessary materials, but in the meantime, I will be submitting the project to qualify for prototype😁
civilizayden
added to the journal ago
Summary of previous work
There is a lot to catch up on. I want to document this project in at least some detail because of how long I have been working on it. This project has taken me the better part of two years, and has been a lot of fun and work. Because Blueprint only started this October, I am only going to be logging the hours since then, even though this log will also be going into detail about everything I have done before then. I will break this project down into the sections that I have done, not necessarily in chronological order.
The first thing I have done is learn how to build this in the first place. I first learned about this hobby when I was really young, going to a local Christmas light show. They have since moved away, leaving me with one option: to build my own. Thankfully, my uncle who lives on the other side of the country built one himself, so he has been a big help answering any questions I have had along the way. I started by watching big light shows from people like Tom BetGeorge. Then, I went to figure out how they were done. I watched videos on YouTube from AboveChristmasLighting and How2Pixel. I found out that I needed to use Xlights to set up and plan my layout, then program it all. I spent a week or so 3D modeling my house in SketchUp (the program that I was using anyway for my architecture and engineering class), and imported it into Xlights. For year one, I had the eaves, the front window, my gate, and my garages outlined in pixels. I also had a “singing” Rudolph coro prop and some arches. Year one xlights layout:
Next up is putting up the eaves. After a lot of research I found that the way that I wanted to do it was by drilling holes in vinyl J-channel to push pixels through. (I use exclusively WS2811 pixels). I designed and 3D printed mounts which screw into my eaves to hang the J-channel, which also allow me to slide it out of view during the Christmas season. My dad and I borrowed my grandfather’s neighbor’s drill press (won’t be the last time) to drill the holes. We then stuck the pixels through, wired it up, and hung it.
Another thing that I had to do was the garages and windows. My mother’s requirement for the show is that it had to have C9-style lights, which is difficult because they do not sell the type she likes with embedded smart pixels. So, I spent some time researching and designing a C9-style bulb which clips onto a WS2811 pixel. The final design is a simple revolve around a profile, 3D printed with fuzzy skin. It snaps onto a pixel, and then it is glued in place into a hole in a PVC pipe (drilled again with the drill press). Then I had to find a way to secure the PVC pipe to the house.
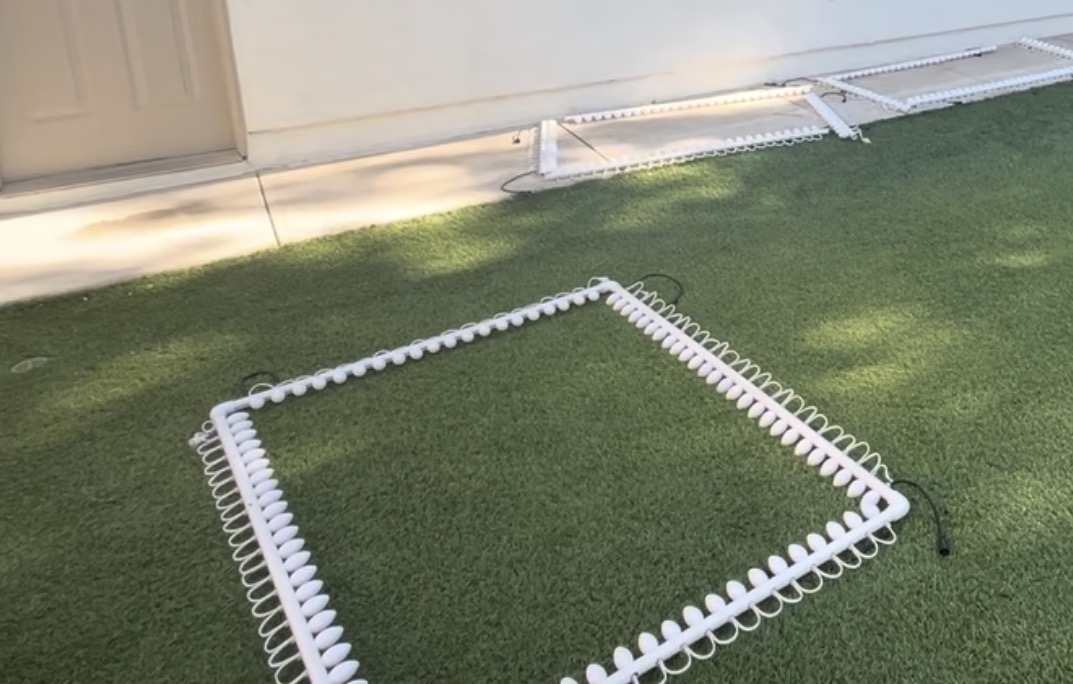
This was a great difficulty, as there was no easy preexisting way to do this. I settled on two methods: magnets and standoffs for the windows and slide-in pucks for the garages. The puck has two countersunk holes for screws to be screwed into the house. You slide in a pvc clip/holder to the puck when you need to put up the lights, then click the PVC into the clip. For the window frames, I had to get creative, as I cannot drill into these. I ended up getting some adhesive metal strips, intended for the backs of phones for magnetic car mounts, and painting them white. I then bought magnets and designed another version of my clip which has a hole in the bottom for the magnet to screw into. I also designed some standoffs with flat bottoms for most of the weight to sit on the windowsill. Now my PVC frames easily clip onto the house, both for the garages and all of the window frames.  !
!
IMG_4721
I also had to have a way to control the pixels. I used the Falcon F48 and its differential receiver boards (thanks to my Uncle for gifting me that). I used 30cal ammo cans, a 12V 15A PSU, and the receiver board all in one box. The newest version of boxes that I build have four outputs of Xconnect pigtails, which are a standard to connect to all of the props I built. The boxes also have ethernet passthrough, since the receiver boards interface with the main controller board through standard ethernet cables. These boxes collectively control all of the props. I have around 8 boxes in use and 2 extras. One of my boxes has a 50A power supply and an automotive fuse block to safely control 1,200 pixels by itself (the candy canes). Additionally, I have a Raspberry Pi running Falcon Pixel Player (FPP) which is used to store the sequences and schedule them to start and stop at the right time, telling the F48 to do and when. I tell Xlights what pixel props are on what ports of the F48, then the software does the heavy lifting to render the sequences and output them to the pixels at 40fps.
I had to make a lot of wires to connect everything to the boxes. To make the wires, I used whatever wire I found laying around as well as some 18 3 wire I bought specifically for this project. Xconnect pigtails were soldered to the wires using 3 heat shrink solder sleeves each and some heat shrink to finish it all off. I think I had around 50 of these that had to be made, not to mention all of the spots where I had to solder the pigtails to the pixels themselves or the pixel-to-pixel connections. Making the wires was a painstaking process, especially since I had to strip every single pigtail wire as well since I bought the cheapest pigtails I could find.
Another thing I had to do was the Coro Props. I 3D printed myself a pixel pusher to push pixels into the high-density props without destroying my fingers. There were many props, and many pixels to push. I bought all of my props except for two from GilbertEngineeringUSA. The two that I didn’t buy, I made, since I bought 6 candy canes from them, then decided that I wanted two more to have an octave of candy canes. Those took a few days by themselves. I then had to mount the coro props. For the hanging coro props, I used PEX tubing to make a frame, then hung them from i-hooks drilled into my eaves with white paracord. The candy canes, arches, and tune-to sign use rebar hammered into the ground with PEX zip-tied to the props so that they slide onto the rebar.
I also had to build the verticals. I used a jig and my pixel pusher to push the pixels into megatree pixel strip, which I then mounted to the house with i-hooks and zip ties. To secure them, I used stakes in the ground, weights on the concrete, and screws into the roof.


There was also all of the programming. I will not go into much detail here, but I used Xlights and a bunch of community sequences (as well as some I got from my Uncle) to program the show. I recorded voiceovers of my family to give the coro props some character between songs, and programmed the lyric tracks for that as well as some of the community sequences I used. There were a few days of troubleshooting before I started up the show this year, which took a few days.
All in all, since October, I have made all of the wires, rebuilt most of the boxes, mounted all of the coro props/verticals, put up all of the props, 3D printed replacement bulb covers, wired up all of the props, programmed the sequences, programmed the intro, bridges, and outro, exported the sequences, made all of the hardware play nice, troubleshooted, and started up the show. In total, I have probably spent over 250 hours on this project thus far, with around 50 of those being in the past two months to get this show conpleted. All that is left to do is the projector.
civilizayden
started Christmas Light Show ago
12/2/2025 - Summary of previous work
There is a lot to catch up on. I want to document this project in at least some detail because of how long I have been working on it. This project has taken me the better part of two years, and has been a lot of fun and work. Because Blueprint only started this October, I am only going to be logging the hours since then, even though this log will also be going into detail about everything I have done before then. I will break this project down into the sections that I have done, not necessarily in chronological order.
The first thing I have done is learn how to build this in the first place. I first learned about this hobby when I was really young, going to a local Christmas light show. They have since moved away, leaving me with one option: to build my own. Thankfully, my uncle who lives on the other side of the country built one himself, so he has been a big help answering any questions I have had along the way. I started by watching big light shows from people like Tom BetGeorge. Then, I went to figure out how they were done. I watched videos on YouTube from AboveChristmasLighting and How2Pixel. I found out that I needed to use Xlights to set up and plan my layout, then program it all. I spent a week or so 3D modeling my house in SketchUp (the program that I was using anyway for my architecture and engineering class), and imported it into Xlights. For year one, I had the eaves, the front window, my gate, and my garages outlined in pixels. I also had a “singing” Rudolph coro prop and some arches. Year one xlights layout:
Next up is putting up the eaves. After a lot of research I found that the way that I wanted to do it was by drilling holes in vinyl J-channel to push pixels through. (I use exclusively WS2811 pixels). I designed and 3D printed mounts which screw into my eaves to hang the J-channel, which also allow me to slide it out of view during the Christmas season. My dad and I borrowed my grandfather’s neighbor’s drill press (won’t be the last time) to drill the holes. We then stuck the pixels through, wired it up, and hung it.
Another thing that I had to do was the garages and windows. My mother’s requirement for the show is that it had to have C9-style lights, which is difficult because they do not sell the type she likes with embedded smart pixels. So, I spent some time researching and designing a C9-style bulb which clips onto a WS2811 pixel. The final design is a simple revolve around a profile, 3D printed with fuzzy skin. It snaps onto a pixel, and then it is glued in place into a hole in a PVC pipe (drilled again with the drill press). Then I had to find a way to secure the PVC pipe to the house.
This was a great difficulty, as there was no easy preexisting way to do this. I settled on two methods: magnets and standoffs for the windows and slide-in pucks for the garages. The puck has two countersunk holes for screws to be screwed into the house. You slide in a pvc clip/holder to the puck when you need to put up the lights, then click the PVC into the clip. For the window frames, I had to get creative, as I cannot drill into these. I ended up getting some adhesive metal strips, intended for the backs of phones for magnetic car mounts, and painting them white. I then bought magnets and designed another version of my clip which has a hole in the bottom for the magnet to screw into. I also designed some standoffs with flat bottoms for most of the weight to sit on the windowsill. Now my PVC frames easily clip onto the house, both for the garages and all of the window frames. !
IMG_4721
I also had to have a way to control the pixels. I used the Falcon F48 and its differential receiver boards (thanks to my Uncle for gifting me that). I used 30cal ammo cans, a 12V 15A PSU, and the receiver board all in one box. The newest version of boxes that I build have four outputs of Xconnect pigtails, which are a standard to connect to all of the props I built. The boxes also have ethernet passthrough, since the receiver boards interface with the main controller board through standard ethernet cables. These boxes collectively control all of the props. I have around 8 boxes in use and 2 extras. One of my boxes has a 50A power supply and an automotive fuse block to safely control 1,200 pixels by itself (the candy canes). Additionally, I have a Raspberry Pi running Falcon Pixel Player (FPP) which is used to store the sequences and schedule them to start and stop at the right time, telling the F48 to do and when. I tell Xlights what pixel props are on what ports of the F48, then the software does the heavy lifting to render the sequences and output them to the pixels at 40fps.
I had to make a lot of wires to connect everything to the boxes. To make the wires, I used whatever wire I found laying around as well as some 18 3 wire I bought specifically for this project. Xconnect pigtails were soldered to the wires using 3 heat shrink solder sleeves each and some heat shrink to finish it all off. I think I had around 50 of these that had to be made, not to mention all of the spots where I had to solder the pigtails to the pixels themselves or the pixel-to-pixel connections. Making the wires was a painstaking process, especially since I had to strip every single pigtail wire as well since I bought the cheapest pigtails I could find.
Another thing I had to do was the Coro Props. I 3D printed myself a pixel pusher to push pixels into the high-density props without destroying my fingers. There were many props, and many pixels to push. I bought all of my props except for two from GilbertEngineeringUSA. The two that I didn’t buy, I made, since I bought 6 candy canes from them, then decided that I wanted two more to have an octave of candy canes. Those took a few days by themselves. I then had to mount the coro props. For the hanging coro props, I used PEX tubing to make a frame, then hung them from i-hooks drilled into my eaves with white paracord. The candy canes, arches, and tune-to sign use rebar hammered into the ground with PEX zip-tied to the props so that they slide onto the rebar.
I also had to build the verticals. I used a jig and my pixel pusher to push the pixels into megatree pixel strip, which I then mounted to the house with i-hooks and zip ties. To secure them, I used stakes in the ground, weights on the concrete, and screws into the roof.
There was also all of the programming. I will not go into much detail here, but I used Xlights and a bunch of community sequences (as well as some I got from my Uncle) to program the show. I recorded voiceovers of my family to give the coro props some character between songs, and programmed the lyric tracks for that as well as some of the community sequences I used. There were a few days of troubleshooting before I started up the show this year, which took a few days.
All in all, since October, I have made all of the wires, rebuilt most of the boxes, mounted all of the coro props/verticals, put up all of the props, 3D printed replacement bulb covers, wired up all of the props, programmed the sequences, programmed the intro, bridges, and outro, exported the sequences, made all of the hardware play nice, troubleshooted, and started up the show. In total, I have probably spent over 250 hours on this project thus far, with around 50 of those being in the past two months to get this show conpleted. All that is left to do is the projector.
12/4/2025 - Worked on projector
I used an old chemical bin and a Dremel to cut holes in it to make a nice box for my projector. However, I was unable to get it working tonight since it is just not bright enough with the street light. I did however get it to work on my computer monitor so I know that it will work once I can get a sheet big enough to cover my garage.
I will update this project with the projector once I get the necessary materials, but in the meantime, I will be submitting the project to qualify for prototype😁
12/6/2025 8 PM - More detailed journal with more accurate hours
Okay, I need to add more stuff to the journal, so I will just paste everything that I did here all at once because I was previously using a google doc, and don't have good pictures for a lot of the process. I also deleted the hours from the first journal and put them in here since I have a more accurate number now.
November 25th - 3 hours
Today I built a box for the candy canes. This box was kind of a pain. It had to handle 1200 pixels all by itself. I had to buy a 12V 50A power supply for this one (rather than the typical 12V 30A ones), and since the fuses on my controller board were only 5A each, I had to get an automotive fuse block, and wire that to the control board and pigtails. A lot of wiring and drilling plastic later, I had a completed box that I have dubbed,“the rat’s nest”.
November 26 - 6 or 7 hours (I’m sorry, I had to)
If you watched the demo video, you will see that I have the coro props as characters playing out a sort of story to lead into the songs. On this day, I had my parents and younger brother record their voiceovers on my computer. On this day, I had also prepared the script that they would read, and it took a while to draft the script, balance the audio, and coordinate with all of them to get it all recorded.
November 27 - 10 hours
It is Thanksgiving day, and today is the day I went live. I spent the entire day finishing up the sequences, adding the radio station to the Tune-to sign, and working on the intros. Since I got everything recorded yesterday, I now need to edit everything together. I recorded everything in one large document in audacity, and with the way Xlights works, I need to separate all of that into separate files to go between each song. I spent many many hours editing things together in audacity, getting the timings right, making sure some audio wasn’t too loud, too quiet, and separating everything into different audio files. I exported this, and it was time to work on the Xlights side of things. I started by getting the lyric tracks down. I use this great tool called auto lyrics by lighting fanatics, which basically puts everything into an X-timing track, which can then be imported into Xlights. Once in Xlights though, everything is in one track for every single character. So, I had to go to every single time a character was talking and put the effect for specifically when they were talking, and when they were not talking, I had to have a different effect for their default closed-mouth state. This was a painstaking process, taking me several hours. After I finally got all of the talking coro props done, I was able to work on the background sequence. I went onto the Xlights share drive and found some nice background sequences that I was able to use for free to make it so the show wasn’t just black when the coro props were talking between the songs. After I got all this done, it was time for Thanksgiving dinner, so I finally uploaded everything to my raspberry pi and hoped that it would work. There were still a few things I needed to fix, but it was good enough to show my family and we all had a great time watching my project come to completion.
Other days (These were done concurrently, so I would work on one for a few hours and then work on the next thing so I didn't get bored):
Rebuilt boxes - 4.5 hours
All of the control boxes that I have made up until this point we’re very painstakingly done. I had very short wires, and it was a pain to service and was slowly breaking the solder off of the control boards. I had to spend about half an hour per box (I had to do 9 of these) soldering longer wires to the pigtails, reconnecting it to the controller, and altogether making them easier to service in the future and the event of failures.
Made cables 9.5 hours
I had so many cables that I needed to make. If you look at the demo, I have around 38 props that have wires going to them, and because I changed my system from last year, each of those props needed a new wire made. I went through 200 feet of wire and spent around 15 minutes per wire getting all of these made. This took a few days in it of itself, and was a very repetitive and annoying process. I had to first strip the wire at both ends, strip the pigtails, get out my heat shrink solder sleeves, attach them to all three of the wires at both ends (so six of them), use the heat gun to melt them together, then cover everything up with heat shrink.
Hang all coro props - 9 hrs
In order to get all the core props on my house, there was a lot I needed to do. From last year, I found the best way to mount them was using PEX tubing, eye hooks, and white paracord. My dad and I had to go up on the roof, drill all of the eye hooks into the roof, cut the paracord to the correct length, cut the PEX to the correct length, Zip tie the PEX to the coro prop, run the paracord through the core prop, and tie it through the eye hook. All of that for one prop. Then we had to do that five more times.
Passthrough - 3 hours
There were a lot of cables that I needed to run out of my garage next to the main controller board to the roof and surrounding area. Last year, I just drilled a hole for each cord that I needed, however, this was not sustainable. Therefore, I had to drill out all of the holes that I had previously drilled into one big hole, then put a pass-through box on top of that big hole so that it can be covered during the off-season. Finally, I repaired the wires that I broke during this process and ran them out to where they needed to go.
Installation - 15 hours
This was the easy part, and by the easy part, I mean the part that we had done before. I had to get out all of my props, PVC window frames, garage, outlines, and mounting hardware from the attic. Then I had to sort through the mess I had created and figure out where everything went because I did a terrible job labeling everything last year. Then, I once again enlisted my dad‘s help putting everything up with the systems that I had in place from last year. This took the whole day, and half of the next one. I also had to repair all of the broken 3-D printed C9 covers from last year. On top of that, this involved getting the ladder out and mounting up all of the verticals that I had created during the summer with zip ties and securing them with stakes or weights on the ground.
Designed, 3D printed, and assembled window frame mounts - 10 hours
This part was fun, because it involved more CAD and 3-D printing, which is what I really enjoy. I went through a few iterations, but finally ended up on a 45° version to get the angle with the magnet just right to hold the window frames where they needed to go. I also had to make a separate version that was slightly shorter for the window frame on the far left of the house. After I got the design done, I had to go dig out the window frames from underneath the trailer in the fourth car garage, figure out which was which, and mount them. Mounting them involved going up on the ladder, using isopropyl alcohol to clean the edge of the window frames, sticking the magnet pad onto the window frames after it was painted, bringing the window frames up the ladder, and sticking the magnet mounts snapped onto the window frames to the magnet pads.
Troubleshooting- 11 hours
This caused me much pain. The first major error that I had was pixels, not lining up and everything being a mess of broken data. It took me a couple hours of testing boxes, testing, wires, and testing coral props to realize that this was a software problem. I then realized that I forgot to enter the correct pixel counts for several of the props, leading to the problems I described above. After that, the problems kept coming. For example, for some reason, the candy canes would not light up when I turned some of them on, but the others would turn on. I just messed around with the ports a bit, and ended up working. Same with the tune to sign and arches. Other things that I had to fix included flipped props (upside down in the software), nonfunctioning cables I had to swap out, and flickering props. I found out that the whole left side of the house flickers, but that was only because the garage was open, creating an interference chamber with the radio transmitter. I fixed that simply by closing the garage door for my testing. Another problem was the right window frame on the roof was flickering. This was a data issue, since it was plugged into the window frame next to it instead of directly to the box. Since it was such a long run from this area, I had to get a third box up on the roof, configure the switches within the controller, and then do a lot of software balancing to get the pixels per port right, and then I had to plug everything in.
12/6/2025 9 PM - Requested Changes Question
The project is not mostly code, most of the work went into the hardware, as Christmas light displays like this one is a hobby with a large community, so almost none of the software is mine (though I spent a lot of time improving programs over the summer). While a lot of the project was done before Blueprint, I only logged the hours since halfway through October (I was told that was okay as long as it was since Blueprint started), and have written everything in a google doc instead of the journals, which is why it seems hastily added. The parts I did software-wise were all of the intros, the layouts, the tune-to effects, effect mapping (most of the effects I found pre-timed, but had to map them to my specific display), and the connection to FPP. It is not code per se, but there was an awful lot of programming I had to do to get this work. I tried to upload them to Github, but it said they were all too large. Can I take a screen recording of all of the files and the Xlights layout instead?
12/7/2025 - Added Files
I put all of my sequence files and Xlights layout folder in the Github Repo. To view, download Xlights (xlights.org) and choose the uploaded "layout and xlights config" folder as the show folder. Then, in sequencer, you can open each of the sequences to view them. Don't forget to render them if you want to play them back and see what they look like.
1/5/2026 - Preparing for next year
I spent a day with my dad taking the show down and finding a place to store it. I also started planning out what I am going to add next year. I already ordered 5000 pixels from China to get them for cheap, and I prepared my layout for next year. I will be adding a megatree, four minitrees, matrixes in all of the upper windows and a HUGE snowflake (600 nodes and 6 ft tall). I will also be adding two DMX beams, which I will mount on the roof. I can't wait!