Frople
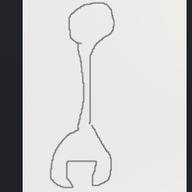
Frople is a split ergonomic keyboard. It has 40 low profile choc keys, utilizing a 6 by 3 main grid with a 2 key thumbfan. It includes 2 rotary encoders. The firmware is made in QMK and configurable in realtime through VIA.
Created by
 Bole
Bole
Tier 3
35 views
0 followers
 CAN ⚡🚀
approved Frople ago
CAN ⚡🚀
approved Frople ago
Tier approved: 3
Grant approved: $103.00
Thanks for updating your readme
Bole
submitted Frople for ship review ago
 m0.hid ⚡
requested changes for Frople ago
m0.hid ⚡
requested changes for Frople ago
Hi! Great work on this keyboard! Before I can mark this as approved can you add some images of your full assembly onto your github README, and an image of your full cart showing how much of each item you're buying. Thanks!
Bole
submitted Frople for ship review ago
 Iamalive 🚀
requested changes for Frople ago
Iamalive 🚀
requested changes for Frople ago
Heyo, cool split keyboard! Like you said, this is only going to be able to constitute as a tier 3 project. This means you'll have to pay the extra cost above $100 out of pocket. Maybe if you can design a really cool cad case for it? Also, please read https://blueprint.hackclub.com/about/submission-guidelines and fix your readme, and also add shipping option that you choose for your pcb!
Bole
submitted Frople for ship review ago
Bole
added to the journal ago
Created BOM.csv
Midnight inspiration carried over to the next day, and I had a snow day so no school. anyway I think I'm done
- created bom.csv
- exported stuff for production
- no case because IDK how to cad

Bole
added to the journal ago
Firmware
So for the longest time I had a mental block with the firmware. However, I have just recieved the gift of midnight inspiration and absolutely ripped through the firmware with a bit of help from ai.
- created firmware
- compiled it

Bole
added to the journal ago
FINISHED RIGHT PCB ROUTING :rac-lfg:
I finished routing up the right PCB. I want to make some nice silkscreen art and then a case to continue on. These routing jobs are kinda terrible but it should work just fine seeing as it passes DRC without any errors

Bole
added to the journal ago
Begun on Right PCB
I copied the left PCB for a starting point and flipped/rotated a bunch of stuff so that it would work. I wired up the diodes kinda and now need to move on the routing the rest of the PCB.

Bole
added to the journal ago
FINISHED LEFT PCB, ON TO THE RIGHT
I fixed up some footprint shenanigans (its always those footprints). I wired up the entire PCB (this is likely one of the worst tracing jobs I have ever done, but it works).

Bole
added to the journal ago
Got a significant amount of the left PCB done
I first had to make the entire schematic which took all of aobut 30 minutes, which included setting up the footprint and symbol libraries which is a bit of a pain, I then layed out the PCB and dug up an old commit for the layout of the keyboard

Bole
added to the journal ago
2 MONTHS LATER
looking back everything in this was so cooked and since I know now how to do stuff I think im going to start from scratch. It shouldnt be so hard as i just need to do everything all over again. :pf: this will be fun

Bole
added to the journal ago
Finished Designing PCB
All files are ready for fabrication and assembly by JLCPCB I think. I went through their file preparation guide so I think it should all be good. Feeling nervous about finalizing my product but here we go, will be shipping this in the near future

Bole
added to the journal ago
Placed footprints for right PCB
- I placed the footprints for the right pcb
- KiCAD crashed and I lost like 10 minutes of progress yay autosave
- pcb design being annoying
- trying to find parts for bom.csv from lcsc and jlcpcb is very annoying. I think I am going to have to solder the Arduino pro-micro myself with help from a friend because i don't have an iron. (yet... tool bag here I come)

Bole
added to the journal ago
Fixed the pcb
- i fixed the pcb
- i really havent gotten much done recently
i just need to push through to the finish
todo:
make right pcb
set up bom.csv for jlcpcb pcba service
make some cool renders in blender yay!

idk what happened to the formating on this one :heavysob:
Bole
added to the journal ago
More PCB shenanigans
- placed the pcb components and lined them up with the layout I laid out in ergogen
- routed the traces, spent like 5 minutes finding the last trace
- the 3d models are all messed up and something is messed up with everything
- idek how to explain it
- everything is on the wrong side of the pcb somehow

- to do
- fix pcb
- make right side of pcb
- prepare for fabrication
Bole
added to the journal ago
SO turns out i cant fully use ergogen
- uhh, so the docs/faq didnt mention ergogen, turns out the ones on slack are different
- uhhh, so we can use ergogen to design keyboard layout but not pcb
- so i made the schematic from scratch and now im going to do the pcb
- at least it makes designing pcb/schematic/case easier pretty much

Bole
added to the journal ago
Preparations for fabrication
- finalized keyboard design (not including case and other stuff, just the pcb and components that go on said pcb)
- finished wiring up left side of keyboard
- begun making the schematic because ergogen only outputs the pcb file and blueprint needs pcb and schematic file for submission.
-

Bole
added to the journal ago
Begun design of pcb
- did research on part pricing
- started budgeting my build and researching keycaps, switches, encoders etc
- begun design and layout of pcb
- decided on a wired split design using a TRRS cable to communicate between each side
- have ideas for a case (wrist rest mayhaps)
- FlatFootFoxes guide, which i have been using to learn how to use Ergogen, is not of as much help now due to how our designs diverge.

Bole
added to the journal ago
Designed key layout
- took measurements of my hands
- did research on how to use said measurements in keyboard layout
- made the keyboard layout using ergogen
- spent a while (not included in time estimate, it was like 30 minutes tho) configuring the GODDAMN PRINTER
verified that there was no overlap between keys which is a bit harder (not much) than it sounds due to how ergogen renders keys

printed out a couple tests for the key layout to make sure it felt good to type on

- figured out how to push to github so now you can see my code on github (also not included in time estimate, it was like 30 minutes also, github CLI hates me)
Bole
added to the journal ago
Designed keymap


- Defined all the keys in ergogen
- came up with a 40 key layout (6x3 main body 1x2 thumbfan)
- Designed the keymap utilizing home-row-mods and special layers configurable in zmk.
- I am planning on implementing Hyprland specific keybinds to the keymap to let me navigate my window manager faster
next steps:
- design key layout in ergogen for ergonomics
- brainstorm case designs
Bole
added to the journal ago
Begun Design of key layout
- Begun keyboard definition in ergogen
- read through FlatFootFox's "Lets Design a Keyboard" introduction and 1/4 of part 1 ( https://flatfootfox.com/ergogen-part1-units-points/ )
- Did research on implementing rotary encoder and/or sliding potentiometer into keyboard design; rotary encoder is feasable, sliding potentiometer is not

Bole
started Frople ago
10/13/2025 10 AM - Begun Design of key layout
- Begun keyboard definition in ergogen
- read through FlatFootFox's "Lets Design a Keyboard" introduction and 1/4 of part 1 ( https://flatfootfox.com/ergogen-part1-units-points/ )
- Did research on implementing rotary encoder and/or sliding potentiometer into keyboard design; rotary encoder is feasable, sliding potentiometer is not
10/13/2025 5 PM - Designed keymap
- Defined all the keys in ergogen
- came up with a 40 key layout (6x3 main body 1x2 thumbfan)
- Designed the keymap utilizing home-row-mods and special layers configurable in zmk.
- I am planning on implementing Hyprland specific keybinds to the keymap to let me navigate my window manager faster
next steps:
- design key layout in ergogen for ergonomics
- brainstorm case designs
10/15/2025 - Designed key layout
- took measurements of my hands
- did research on how to use said measurements in keyboard layout
- made the keyboard layout using ergogen
- spent a while (not included in time estimate, it was like 30 minutes tho) configuring the GODDAMN PRINTER
verified that there was no overlap between keys which is a bit harder (not much) than it sounds due to how ergogen renders keys
printed out a couple tests for the key layout to make sure it felt good to type on
- figured out how to push to github so now you can see my code on github (also not included in time estimate, it was like 30 minutes also, github CLI hates me)
10/16/2025 12 AM - Begun design of pcb
- did research on part pricing
- started budgeting my build and researching keycaps, switches, encoders etc
- begun design and layout of pcb
- decided on a wired split design using a TRRS cable to communicate between each side
- have ideas for a case (wrist rest mayhaps)
- FlatFootFoxes guide, which i have been using to learn how to use Ergogen, is not of as much help now due to how our designs diverge.
10/16/2025 10 PM - Preparations for fabrication
- finalized keyboard design (not including case and other stuff, just the pcb and components that go on said pcb)
- finished wiring up left side of keyboard
- begun making the schematic because ergogen only outputs the pcb file and blueprint needs pcb and schematic file for submission.
-
10/18/2025 - SO turns out i cant fully use ergogen
- uhh, so the docs/faq didnt mention ergogen, turns out the ones on slack are different
- uhhh, so we can use ergogen to design keyboard layout but not pcb
- so i made the schematic from scratch and now im going to do the pcb
- at least it makes designing pcb/schematic/case easier pretty much
10/19/2025 - More PCB shenanigans
- placed the pcb components and lined them up with the layout I laid out in ergogen
- routed the traces, spent like 5 minutes finding the last trace
- the 3d models are all messed up and something is messed up with everything
- idek how to explain it
- everything is on the wrong side of the pcb somehow
- to do
- fix pcb
- make right side of pcb
- prepare for fabrication
10/21/2025 - Fixed the pcb
- i fixed the pcb
- i really havent gotten much done recently
i just need to push through to the finish
todo:
make right pcb
set up bom.csv for jlcpcb pcba service
make some cool renders in blender yay!
idk what happened to the formating on this one :heavysob:
10/22/2025 - Placed footprints for right PCB
- I placed the footprints for the right pcb
- KiCAD crashed and I lost like 10 minutes of progress yay autosave
- pcb design being annoying
- trying to find parts for bom.csv from lcsc and jlcpcb is very annoying. I think I am going to have to solder the Arduino pro-micro myself with help from a friend because i don't have an iron. (yet... tool bag here I come)
10/23/2025 - Finished Designing PCB
All files are ready for fabrication and assembly by JLCPCB I think. I went through their file preparation guide so I think it should all be good. Feeling nervous about finalizing my product but here we go, will be shipping this in the near future
12/14/2025 7 PM - 2 MONTHS LATER
looking back everything in this was so cooked and since I know now how to do stuff I think im going to start from scratch. It shouldnt be so hard as i just need to do everything all over again. :pf: this will be fun
12/14/2025 9 PM - Got a significant amount of the left PCB done
I first had to make the entire schematic which took all of aobut 30 minutes, which included setting up the footprint and symbol libraries which is a bit of a pain, I then layed out the PCB and dug up an old commit for the layout of the keyboard
12/15/2025 - FINISHED LEFT PCB, ON TO THE RIGHT
I fixed up some footprint shenanigans (its always those footprints). I wired up the entire PCB (this is likely one of the worst tracing jobs I have ever done, but it works).
12/16/2025 1 PM - Begun on Right PCB
I copied the left PCB for a starting point and flipped/rotated a bunch of stuff so that it would work. I wired up the diodes kinda and now need to move on the routing the rest of the PCB.
12/16/2025 2 PM - FINISHED RIGHT PCB ROUTING :rac-lfg:
I finished routing up the right PCB. I want to make some nice silkscreen art and then a case to continue on. These routing jobs are kinda terrible but it should work just fine seeing as it passes DRC without any errors
1/14/2026 - Firmware
So for the longest time I had a mental block with the firmware. However, I have just recieved the gift of midnight inspiration and absolutely ripped through the firmware with a bit of help from ai.
- created firmware
- compiled it
1/15/2026 - Created BOM.csv
Midnight inspiration carried over to the next day, and I had a snow day so no school. anyway I think I'm done
- created bom.csv
- exported stuff for production
- no case because IDK how to cad