Split Keyboard
My first split keyboard. I followed the guide and tried to add my own designs. This has 42 mechanical switches with diode in the back to prevent ghosting and make it work smoother. I 3d printed my case in black and blue and think it looks really nice. I tried going for an old black build but ran out of my black filament. I had so much fun building this!
Created by
 Burst
Burst
Tier 3
48 views
0 followers
 CAN ⚡🚀
approved Split Keyboard ago
CAN ⚡🚀
approved Split Keyboard ago
Tickets awarded: 77 tickets
Tier: 3
Very cool!
Burst
submitted Split Keyboard for ship review ago
 cubit010 ⚡
requested changes for Split Keyboard ago
cubit010 ⚡
requested changes for Split Keyboard ago
fixing paglu perma reject!
you should be good to resubmit now!
Tier: 3
Burst
submitted Split Keyboard for ship review ago
Burst
added to the journal ago
Bluetooth and lots of troubleshooting
I started this session by testing out the code from last time. It worked really well so I wanted to make it Bluetooth now! I started with KMK. It started by crashing alot and not working so I changed the pinout from D0-D4 and rows to D10-D5. I had to se colors to try to see which stage is failed at. In the end I couldn't find the problem. The next day I came and tried using zmk. I tried to compile a code similar to the other with the help of ai, but it also proved faulty and was really hard to set up. I then realized after some search that I had to download two adrafruit libraires for bluetooth and HID. I then focused on making it so one half connect to my computer and then communicated to the other half. I had an annoying bug that made it so my keybaord shows up, but when I connect the name changes instantly to circuity and disconnects. With some more help from AI I had to remove KMK because it was using too much ram and storage form the bord, I also found an issue that I quickly fixed up, it was this disablebleworkflow(). I then lastly made a version that is very light and makes both halves connect to the computer. I utilized both of the libraries that I downloaded earlier. I added light to help me debugg, and after some back and forth, I tested the left and it worked!!!!. I then quickly put the c


ode on the right half and it worked too. After some quick bug fixes with AI I was able to connect both halves together with them both typing. AI really assisted me heavily in this code but I tried to learn and understand every single step. This whole process was so back and forth with testing, on both sides, to try every version that I made. I will polish up the design and that should be it.
Burst
added to the journal ago
Continued soldering and almost done
Started by soldering the xiao on the PCB after I took it off last time to find the bad connection and solder the battery before I put it on the PCB. I took two wires and tried to solder them so many times but they kept coming off. I got some pliers and bend the end of the wires to get more surface area. It took me 20 minutes to get the wires onto the xiao. Then I passed the wires through the holes on the PCB and and soldered the xiao on the PCB. Because I accidentally didn't use the through hole footprint I had to make like a mountain of solder to connect to the top of the xiao and make it actually work. After that was done I saw that the battery pads were already exposed on the other half of the keyboard so I pushed some wire and solder through and soldered it. I then took both battery and trimmed the wire a bit and then soldered them to the wires that were connected to the xiao pads. After a couple tries, it actually worked!!. Next I went and got my calipers and started measuring my Pcb. Since last time my case didn't work, I took the measurements all the dimensions I made the lid and made sure to include tolerances. I'm first going to print both bottoms of the cases and try the old top to save filament. This was a really good process to follow. Next time I will figure out Bluetooth and I think that should be it. I lastly put all the key caps on the keyboard and it looked so good! I then sliced a small part of the case to ensure fit and it was really good. I just sent the full part to get printed, hopefully it turns out good!

 !
!


t!


Burst
added to the journal ago
Code and trouble shoot

I started working on the code to get the keyboard to work. I used the matrix mapping from the schematic and with help from AI I got some keys to work, I'm trying to trouble shoot why some don't work
Burst
added to the journal ago
Xiao soldering


I started by trying to add solder to the pads on the PCB and then put the xiao on top and solder them. This didn't work out well so I switched to putting the solder on the xiao and the PCB and then soldering the together. I had to be carefully because there a trace there close by. I then got solder shaped like a hook and tried to bridge in between and it worked. I repeated that till everything was soldered!
Burst
added to the journal ago
Soldering switches


I started by pressing all 42 switches into place. I then flipped the PCB and started soldering all of them. In the beginning I had a problem where the iron wasn't melting anything. I found out that the problem was that the iron was oxidized and not letting the heat transfer. I cleaned it with the small yellow sponge and re tinned. I then kept soldering the switches, which was really way compared to everyone else. They turned out great!
Burst
added to the journal ago
Diodes


I started by putting on all the diodes for the left side of the keyboard, this was hard because I had to orient them using the tweezers and then solder. My stradegy was to do one side of all the diodes and then go back and solder the other side. I found this to be way faster. I then moved on to the right side, dabbed all the pads with solder, then I used the same stradegy and soldered all the dioes
Burst
added to the journal ago
Soldering the resistors, prepping diodes


I started soldering by first dabbing the resistor spots with solder because they are so tiny. I then took tweezers and held the resistor in place while soldering it. I did this for all four of them, which took a couple tries since they kept flying away. I then went ahead and dabbed all the diode spots (all 22) with solder on both pads. Once I got in my flow state I went faster.
Burst
added to the journal ago
Setting up, getting ready


After all my parts arrived I separated them, took them out of the container and organized them. I broke off the PCBs and took the xiao out of the container and put the tiny resistors in there. I then found which resistors go to r1 and r2 and then I reaserched the polarity of the diodes
 Iamalive 🚀
approved Split Keyboard ago
Iamalive 🚀
approved Split Keyboard ago
Tier approved: 3
Grant approved: $98.00
Great project!
Burst
submitted Split Keyboard for ship review ago
Burst
added to the journal ago
Spent time updating the BOM and finding new items
I found new items on aliexpress since the prices changed alot since the last time. I added new pins, since the others were out of stock. I also added batteries to the cart to the keyboard can be powwered on.
 Tanuki ⚡🚀
requested changes for Split Keyboard ago
Tanuki ⚡🚀
requested changes for Split Keyboard ago
Hey! Please include the BOM links in the .csv. cool project!
Burst
submitted Split Keyboard for ship review ago
Burst
added to the journal ago
Talked with Reviewer
I messaged my reviewer and we couldn't find cheaper switches
as it was a mistake on his part. I will resubmit this as we both confirmed having the cheapest parts possible!
 Ice (Very Chill)
requested changes for Split Keyboard ago
Ice (Very Chill)
requested changes for Split Keyboard ago
There is a 50-piece option on Aliexpress for the keyswitches. Please use that instead.
Burst
submitted Split Keyboard for ship review ago
Burst
added to the journal ago
Note for reviewers
Hello, I have lowered the price lots of times and spend a couple hours looking for the best price. I ask you to let me know what I can lower and provide me with options or just general help. Please don't just state what the reviewer before stated 
Ice (Very Chill)
requested changes for Split Keyboard ago
I like the amount of effort put in! I think that you can still optimise the price, though.
Burst
submitted Split Keyboard for ship review ago
Burst
added to the journal ago
Note to Reviewer!
I don't want a grant I only want tickets! Thanks.

Hhhhhhhhhhhhhhhhh HhhhhhhhhhhhhhhhhHhhhhhhhhhhhhhhhhHhhhhhhhhhhhhhhhhHhhhhhhhhhhhhhhhhHhhhhhhhhhhhhhhhhHhhhhhhhhhhhhhhh
 PenguinMo
requested changes for Split Keyboard ago
PenguinMo
requested changes for Split Keyboard ago
This is cool but didn't really reduced the price try to reduce the price of the keyswitches
Burst
submitted Split Keyboard for ship review ago
Burst
added to the journal ago
Clarification
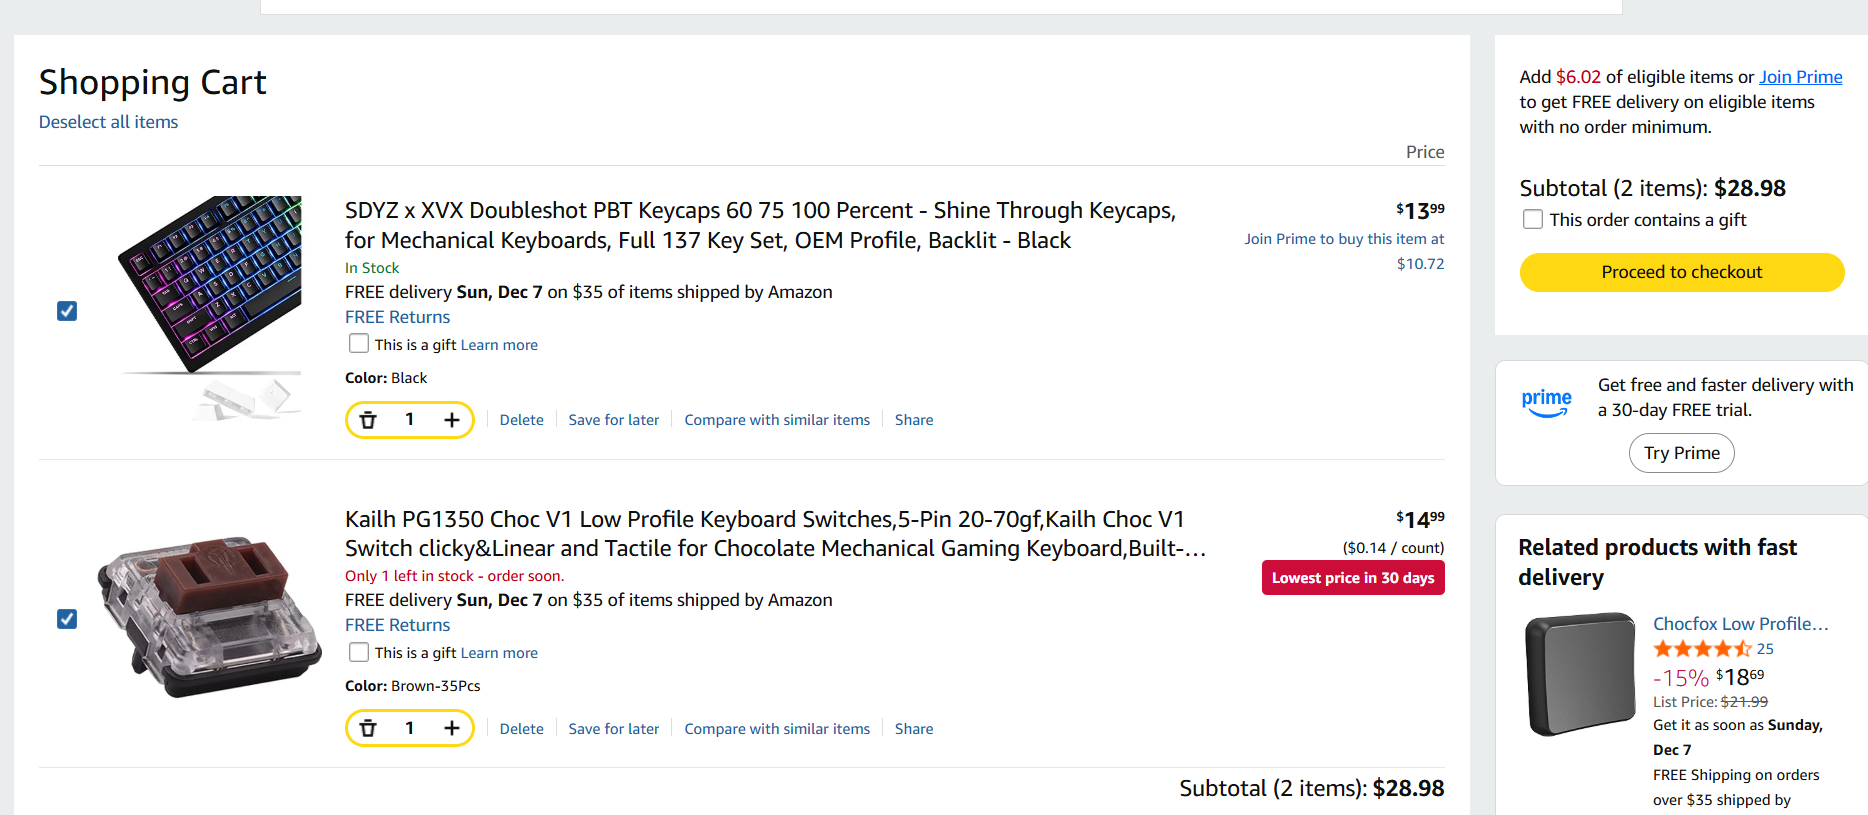
Hello, I have looked everything on aliexpress for cheaper parts. I have gotten items from amazon and aliexpress to mimize costs. If you know a webste that has an item for cheaper please link it below.
CAN ⚡🚀
requested changes for Split Keyboard ago
I cant read these cart screenshots but it shouldn't be this expensive if you are using the cheapest vendors.
Burst
submitted Split Keyboard for ship review ago
Burst
added to the journal ago
Added video
Screen Recording 2025-12-17 at 4.25.08 PM
I added this video to the repo, as the reviewer requested 
.
 Jay ⚡🚀
requested changes for Split Keyboard ago
Jay ⚡🚀
requested changes for Split Keyboard ago
I can't seem to see the full card in this screenshot. Can you please do a full screenshot for this? https://blueprint.hackclub.com/user-attachments/blobs/redirect/eyJfcmFpbHMiOnsiZGF0YSI6MjU2NTUsInB1ciI6ImJsb2JfaWQifX0=--10cc933598ffa8b567983f7f3fa1c08e8819b2c7/527359926-4e6fdd18-7ae3-4a92-9560-25e297c171c3.png?disposition=inline
Burst
submitted Split Keyboard for ship review ago
Burst
added to the journal ago
Added The Correct .Step File
I changed the fd3 file in the CAD Folder in Github to a .step file. This was requested by the reviewer as all files have to be .step. This was done using the online fusion service.
PenguinMo
requested changes for Split Keyboard ago
ALL of your CAD should be in .step not just one, this is all your missing
Burst
submitted Split Keyboard for ship review ago
Burst
added to the journal ago
Finished Everything Reviewer Asked For and Cart


I finished everything the reviewer asked from me. I added all the files in their corresponding CAD/PCB folders. I added all the missing component to ali-express and updated the cart. This project if Finished!!!!
Burst
added to the journal ago
Finished Top Case

Finished the top case for the keyboard and made alignment holes in the top and bottom. The Right and left are different so It takes two version. I traced the outline and gave space for keys. I had to make two-three itterations.
 technical_.
requested changes for Split Keyboard ago
technical_.
requested changes for Split Keyboard ago
Requires a top case/cover/plate.
Your cart screenshots should show the full cart image, not just pictures of the price, so we know what you are ordering.
In addition, please organize your repo, and put relevant files into folder.
Burst
submitted Split Keyboard for ship review ago
Burst
added to the journal ago
Polished and finished up
I updated the BOM with missing parts. Secondly I added a silkscreen to make the pcb look nicer. I got AI to help me with the firmware which took a good chunk of time. I tried sourcing some parts for digikey but the shipping made it useless. Added all files to the github repo so I can submit!


Here is the timer: 
Burst
added to the journal ago
Finished BOM
I found all the parts I needed, It was really a pain because of the aliexpress fake pricing. But In the end i got it done.I will start firmwaare laterScreenshot 2025-11-29 131643
here is the stop watch:

Burst
added to the journal ago
Finished Case, started BOM and firmware

I started the BOM and started looking parts. Then I had a hard time with fusion because the switches make it crash alot. I finally had to make the case instead of the actually keycaps. I had AI help me start the firmware.  <!-- Uploading Screenshot 2025-11-28 202512.png #ms-1764379731894-jdf6hg -->
Finally the stopwatch:
Burst
added to the journal ago
Got the keyswitchs 3d model!
This was one of the hardest parts of the project. First I had to find the models of both the switch and keycap online, second I had to combine them in fusion. I then had to figure out how to add them in kicad. Then went into the footprint editor and adjusted the 3d models to fit. After a bit confusion I learned that i had to update the footprint for it to show up.


Here's the timer (inspired from another project)

Burst
added to the journal ago
Polished PCB and started case
Fixed a few last erros in the pcb. One was a wrong GNG connection. The other was an outline/ecxport error which i got fixed. Started modeling up the case in cad and will start importing switches soon. 
Burst
added to the journal ago
Finished PCB+outline and organized it
I continued to work on this project after a couple days. I put all the pcb components in the right spots. I got my lost board from backups and continued to work on that. I most importantly routed most the parts and ran drc to make sure everything works. I ran into a lot of problems with the silkscreen and board outline, which pushed me back. However, using the support channel i was able to go forward. I still need a route a couple parts that are across the keyboard and will hopefully find a fix for them 
Burst
added to the journal ago
Sad PDB

I added the diodes and tried spacing out the pcb better making it more organized. However I made a dumb mistake and accidentally reverted most of the chanes. So now I have to redo most of it.
Burst
added to the journal ago
Started PCB

I fixed all the errors in schematic to start making my pcb. I added all the components and started to arrange them so I can get closer to finishing this project.
Burst
added to the journal ago
Cleaned up schematics and finished foorprints.


I cleaned up the schematic and added borders to organize it. Added the mounting holes and the battery sense to tell the computer the keyboards battery. Lastly I assigned the footprint, which took alot of time because I didn't know what I'm doing.
Burst
added to the journal ago
Finished Schematic (mostly)

I added all the switches in the schematic. I have five rows and five columns with all of them labeled and routed to the Xiao. I added the battery test connector from the guide and will move on to adding the footprints.
Burst
added to the journal ago
Installed all re

Following the guide, I installed the custom mod battery for the ki-cad footprint.
Second I installed marbaslib library for the switches. Lastly I installed the last library required for the mouse bites.
Burst
started Split Keyboard ago
11/19/2025 - Installed all re
Following the guide, I installed the custom mod battery for the ki-cad footprint.
Second I installed marbaslib library for the switches. Lastly I installed the last library required for the mouse bites.
11/20/2025 - Finished Schematic (mostly)
I added all the switches in the schematic. I have five rows and five columns with all of them labeled and routed to the Xiao. I added the battery test connector from the guide and will move on to adding the footprints.
11/21/2025 8 PM - Cleaned up schematics and finished foorprints.
I cleaned up the schematic and added borders to organize it. Added the mounting holes and the battery sense to tell the computer the keyboards battery. Lastly I assigned the footprint, which took alot of time because I didn't know what I'm doing.
11/21/2025 9 PM - Started PCB
I fixed all the errors in schematic to start making my pcb. I added all the components and started to arrange them so I can get closer to finishing this project.
11/22/2025 - Sad PDB
I added the diodes and tried spacing out the pcb better making it more organized. However I made a dumb mistake and accidentally reverted most of the chanes. So now I have to redo most of it.
11/27/2025 - Finished PCB+outline and organized it
I continued to work on this project after a couple days. I put all the pcb components in the right spots. I got my lost board from backups and continued to work on that. I most importantly routed most the parts and ran drc to make sure everything works. I ran into a lot of problems with the silkscreen and board outline, which pushed me back. However, using the support channel i was able to go forward. I still need a route a couple parts that are across the keyboard and will hopefully find a fix for them
11/28/2025 12 PM - Polished PCB and started case
Fixed a few last erros in the pcb. One was a wrong GNG connection. The other was an outline/ecxport error which i got fixed. Started modeling up the case in cad and will start importing switches soon.
11/28/2025 2 PM - Got the keyswitchs 3d model!
This was one of the hardest parts of the project. First I had to find the models of both the switch and keycap online, second I had to combine them in fusion. I then had to figure out how to add them in kicad. Then went into the footprint editor and adjusted the 3d models to fit. After a bit confusion I learned that i had to update the footprint for it to show up.
Here's the timer (inspired from another project)
11/28/2025 8 PM - Finished Case, started BOM and firmware
I started the BOM and started looking parts. Then I had a hard time with fusion because the switches make it crash alot. I finally had to make the case instead of the actually keycaps. I had AI help me start the firmware. <!-- Uploading Screenshot 2025-11-28 202512.png #ms-1764379731894-jdf6hg -->
Finally the stopwatch:
11/29/2025 - Finished BOM
I found all the parts I needed, It was really a pain because of the aliexpress fake pricing. But In the end i got it done.I will start firmwaare laterScreenshot 2025-11-29 131643
here is the stop watch:
11/30/2025 - Polished and finished up
I updated the BOM with missing parts. Secondly I added a silkscreen to make the pcb look nicer. I got AI to help me with the firmware which took a good chunk of time. I tried sourcing some parts for digikey but the shipping made it useless. Added all files to the github repo so I can submit!
Here is the timer:
12/16/2025 8 PM - Finished Top Case
Finished the top case for the keyboard and made alignment holes in the top and bottom. The Right and left are different so It takes two version. I traced the outline and gave space for keys. I had to make two-three itterations.
12/16/2025 9 PM - Finished Everything Reviewer Asked For and Cart
I finished everything the reviewer asked from me. I added all the files in their corresponding CAD/PCB folders. I added all the missing component to ali-express and updated the cart. This project if Finished!!!!
12/17/2025 11 AM - Added The Correct .Step File
I changed the fd3 file in the CAD Folder in Github to a .step file. This was requested by the reviewer as all files have to be .step. This was done using the online fusion service.
12/17/2025 4 PM - Added video
Screen Recording 2025-12-17 at 4.25.08 PM
I added this video to the repo, as the reviewer requested
.
12/18/2025 - Clarification
Hello, I have looked everything on aliexpress for cheaper parts. I have gotten items from amazon and aliexpress to mimize costs. If you know a webste that has an item for cheaper please link it below.
12/24/2025 - Note to Reviewer!
I don't want a grant I only want tickets! Thanks.
Hhhhhhhhhhhhhhhhh HhhhhhhhhhhhhhhhhHhhhhhhhhhhhhhhhhHhhhhhhhhhhhhhhhhHhhhhhhhhhhhhhhhhHhhhhhhhhhhhhhhhhHhhhhhhhhhhhhhhh
12/27/2025 3 PM - Note for reviewers
Hello, I have lowered the price lots of times and spend a couple hours looking for the best price. I ask you to let me know what I can lower and provide me with options or just general help. Please don't just state what the reviewer before stated
12/27/2025 5 PM - Talked with Reviewer
I messaged my reviewer and we couldn't find cheaper switches
as it was a mistake on his part. I will resubmit this as we both confirmed having the cheapest parts possible!
1/2/2026 - Spent time updating the BOM and finding new items
I found new items on aliexpress since the prices changed alot since the last time. I added new pins, since the others were out of stock. I also added batteries to the cart to the keyboard can be powwered on.
3/9/2026 5:27 PM - Setting up, getting ready
After all my parts arrived I separated them, took them out of the container and organized them. I broke off the PCBs and took the xiao out of the container and put the tiny resistors in there. I then found which resistors go to r1 and r2 and then I reaserched the polarity of the diodes
3/9/2026 5:44 PM - Soldering the resistors, prepping diodes
I started soldering by first dabbing the resistor spots with solder because they are so tiny. I then took tweezers and held the resistor in place while soldering it. I did this for all four of them, which took a couple tries since they kept flying away. I then went ahead and dabbed all the diode spots (all 22) with solder on both pads. Once I got in my flow state I went faster.
3/9/2026 6:11 PM - Diodes
I started by putting on all the diodes for the left side of the keyboard, this was hard because I had to orient them using the tweezers and then solder. My stradegy was to do one side of all the diodes and then go back and solder the other side. I found this to be way faster. I then moved on to the right side, dabbed all the pads with solder, then I used the same stradegy and soldered all the dioes
3/9/2026 6:14 PM - Soldering switches
I started by pressing all 42 switches into place. I then flipped the PCB and started soldering all of them. In the beginning I had a problem where the iron wasn't melting anything. I found out that the problem was that the iron was oxidized and not letting the heat transfer. I cleaned it with the small yellow sponge and re tinned. I then kept soldering the switches, which was really way compared to everyone else. They turned out great!
3/9/2026 6:56 PM - Xiao soldering
I started by trying to add solder to the pads on the PCB and then put the xiao on top and solder them. This didn't work out well so I switched to putting the solder on the xiao and the PCB and then soldering the together. I had to be carefully because there a trace there close by. I then got solder shaped like a hook and tried to bridge in between and it worked. I repeated that till everything was soldered!
3/9/2026 7 PM - Code and trouble shoot
I started working on the code to get the keyboard to work. I used the matrix mapping from the schematic and with help from AI I got some keys to work, I'm trying to trouble shoot why some don't work
3/26/2026 - Continued soldering and almost done
Started by soldering the xiao on the PCB after I took it off last time to find the bad connection and solder the battery before I put it on the PCB. I took two wires and tried to solder them so many times but they kept coming off. I got some pliers and bend the end of the wires to get more surface area. It took me 20 minutes to get the wires onto the xiao. Then I passed the wires through the holes on the PCB and and soldered the xiao on the PCB. Because I accidentally didn't use the through hole footprint I had to make like a mountain of solder to connect to the top of the xiao and make it actually work. After that was done I saw that the battery pads were already exposed on the other half of the keyboard so I pushed some wire and solder through and soldered it. I then took both battery and trimmed the wire a bit and then soldered them to the wires that were connected to the xiao pads. After a couple tries, it actually worked!!. Next I went and got my calipers and started measuring my Pcb. Since last time my case didn't work, I took the measurements all the dimensions I made the lid and made sure to include tolerances. I'm first going to print both bottoms of the cases and try the old top to save filament. This was a really good process to follow. Next time I will figure out Bluetooth and I think that should be it. I lastly put all the key caps on the keyboard and it looked so good! I then sliced a small part of the case to ensure fit and it was really good. I just sent the full part to get printed, hopefully it turns out good!
!
t!
3/27/2026 - Bluetooth and lots of troubleshooting
I started this session by testing out the code from last time. It worked really well so I wanted to make it Bluetooth now! I started with KMK. It started by crashing alot and not working so I changed the pinout from D0-D4 and rows to D10-D5. I had to se colors to try to see which stage is failed at. In the end I couldn't find the problem. The next day I came and tried using zmk. I tried to compile a code similar to the other with the help of ai, but it also proved faulty and was really hard to set up. I then realized after some search that I had to download two adrafruit libraires for bluetooth and HID. I then focused on making it so one half connect to my computer and then communicated to the other half. I had an annoying bug that made it so my keybaord shows up, but when I connect the name changes instantly to circuity and disconnects. With some more help from AI I had to remove KMK because it was using too much ram and storage form the bord, I also found an issue that I quickly fixed up, it was this disablebleworkflow(). I then lastly made a version that is very light and makes both halves connect to the computer. I utilized both of the libraries that I downloaded earlier. I added light to help me debugg, and after some back and forth, I tested the left and it worked!!!!. I then quickly put the c
ode on the right half and it worked too. After some quick bug fixes with AI I was able to connect both halves together with them both typing. AI really assisted me heavily in this code but I tried to learn and understand every single step. This whole process was so back and forth with testing, on both sides, to try every version that I made. I will polish up the design and that should be it.