Star LED Casher
Hello, in this project I designed a LED casher that looks like a star. I wanted to make this as a keychain for my backpack. It has 10 different color of LEDs that can flash in sequence
Created by
 m**ia
m**ia
Tier 5
8 views
0 followers
m**ia
added to the journal ago
Desoldering and Soldering againn
Okay guys so.. yea, after the last journal I desolder the PCB then wait for the flux.
After the flux came, I start to solderign it again.
I think the flux do make it easier but not as easy as I thought before.. Initially I thought that the flux can just making the soldering iron automatically stuck.. But in my case, no.
Well I don't know why, yes the flux do like become a liquid and fill up the holes, but when I apply the soldering iron there (with the solder it self heat up the pins), it actually wouldn't melt. I need to like directly touch the soldering iron to the solder (context: I had set it to 400°C). Then the soldering iron will perform like a blob. Then I guide it to the holes. After that, it somehow didnt go to the holes at once, like hydrophilic (is that the right term? ) yea like that.. and I need to push it further so that it can stuck to the holes.
And yeah.. it perform a big blob but.. the result turns out better than what I expected..
Front look

Back Look

Oh and perhaps if someone wanted to give me some suggestion, I am open to it.
Next, I wanted to figure out how can I place the battery and the remaining components
m**ia
added to the journal ago
My Parts Came!
Finally after I have been waiting for weeks my parts on LED casher project finally came! and complete(This happe at yesterday night actually). So after all of that things came here, I start to assembly the kit.
To be honest, I am kinda upset with the pcb manufacture that I contact (RafTech PCB in Indonesia) as they conducted miscommunication with me, and even they just tell that they did not apply silkscreen on the PCB when they shipped my PCB.. I think for the next project (macropad) I am gonna use the JLCPCB instead. Furthermore, When, I assembly the kit, somehow the pcb part of the battery socket is too small. Gratefully when I design it, I gave the circuit GND and 5V pin also. So, it can be supplied directly to the cable and it did not rely only on batteries.
Then, After I assembly it I watched one random tutorial from youtube abt soldering, and what I get is that you have to like burn the soldering iron directly with the solder and let it drip to the hole. So I follow it, started to soldering the circuit.
When I solder this kit, there are sooooo many problems that occur (This is my first time to solder a pcb). Lemme list the problem:
- Somehow the soldering Iron can not stuck to the pcb, it can't fill up the pcb holes
- The solder is either too hot that make the iron can't stuck to the solder it or the solder is too cold that make the iron is like blob in the pcb
- I smell some burnt things. I hope it can be helped T-T Yea the pcb turns out to be really messy, and I am getting frustated at that time, as I do that late in the night (Yea, I think it is better to do soldering with clear minds)
This morning, I watch another tutorial from youtube. I found a really great tutorial
https://www.youtube.com/watch?v=jz67KgHzXVw
Flux.. hum maybe that what missing in my soldering steps. From this tutorial I learnt a reallly different things compared to the first youtube tutorial that I watch. I recommend you guys watch it.
I also decide to check the circuit, is it working or not..
And, worst, the circuit can't turn on.. X-X
So, I continue to check every LED, like is it ever working even without the PCB ? (turns out one LED didn't work). Yeah, I should have done it since the beginning.
From this assembly and soldering experiece, this is what I learnt:
- Check your component, is it working even without the circuit or not.
- Don't rush and overconfident, especially when it is the first time you are doing this kind of stuff. Watch tutorial from youtube, and don't watch only one tutorial, get refereences from another expertise also
- Do something with clear mind, try to not working up late
- Check again the specification of your parts
What I will do next is that
- The first and ver step is I wanted to desolder all of that thing
- Then, I want to buy some flux
- Checking the pcb connectivity with a digital multimeter
- Try to solder that again Oh and some fun facts. I also record some part of this journey, my struggle, frustation and problems. I think I wanted to upload that with the submit build review video, if I am confident enough hehe
This is the kit that I got

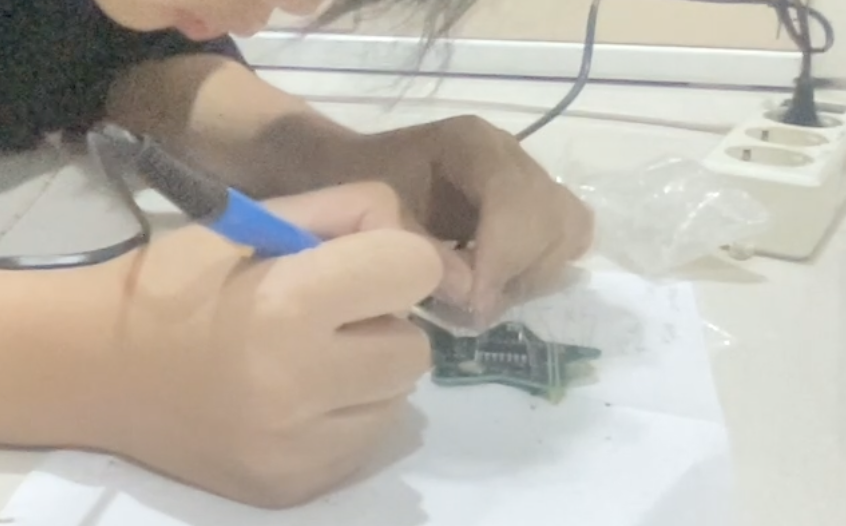
This is me trying to solder the pcb
Screenshot 2026-01-26 at 08.51.48
Stay tuned!
 CAN ⚡🚀
approved Star LED Casher ago
CAN ⚡🚀
approved Star LED Casher ago
Nice project
m**ia
submitted Star LED Casher for ship review ago
 Shaurya Bisht
requested changes for Star LED Casher ago
Shaurya Bisht
requested changes for Star LED Casher ago
needs organized folder system like assets/ pcb/ etc
m**ia
submitted Star LED Casher for ship review ago
m**ia
started Star LED Casher ago
1/26/2026 - My Parts Came!
Finally after I have been waiting for weeks my parts on LED casher project finally came! and complete(This happe at yesterday night actually). So after all of that things came here, I start to assembly the kit.
To be honest, I am kinda upset with the pcb manufacture that I contact (RafTech PCB in Indonesia) as they conducted miscommunication with me, and even they just tell that they did not apply silkscreen on the PCB when they shipped my PCB.. I think for the next project (macropad) I am gonna use the JLCPCB instead. Furthermore, When, I assembly the kit, somehow the pcb part of the battery socket is too small. Gratefully when I design it, I gave the circuit GND and 5V pin also. So, it can be supplied directly to the cable and it did not rely only on batteries.
Then, After I assembly it I watched one random tutorial from youtube abt soldering, and what I get is that you have to like burn the soldering iron directly with the solder and let it drip to the hole. So I follow it, started to soldering the circuit.
When I solder this kit, there are sooooo many problems that occur (This is my first time to solder a pcb). Lemme list the problem:
- Somehow the soldering Iron can not stuck to the pcb, it can't fill up the pcb holes
- The solder is either too hot that make the iron can't stuck to the solder it or the solder is too cold that make the iron is like blob in the pcb
- I smell some burnt things. I hope it can be helped T-T Yea the pcb turns out to be really messy, and I am getting frustated at that time, as I do that late in the night (Yea, I think it is better to do soldering with clear minds)
This morning, I watch another tutorial from youtube. I found a really great tutorial
https://www.youtube.com/watch?v=jz67KgHzXVw
Flux.. hum maybe that what missing in my soldering steps. From this tutorial I learnt a reallly different things compared to the first youtube tutorial that I watch. I recommend you guys watch it.
I also decide to check the circuit, is it working or not..
And, worst, the circuit can't turn on.. X-X
So, I continue to check every LED, like is it ever working even without the PCB ? (turns out one LED didn't work). Yeah, I should have done it since the beginning.
From this assembly and soldering experiece, this is what I learnt:
- Check your component, is it working even without the circuit or not.
- Don't rush and overconfident, especially when it is the first time you are doing this kind of stuff. Watch tutorial from youtube, and don't watch only one tutorial, get refereences from another expertise also
- Do something with clear mind, try to not working up late
- Check again the specification of your parts
What I will do next is that
- The first and ver step is I wanted to desolder all of that thing
- Then, I want to buy some flux
- Checking the pcb connectivity with a digital multimeter
- Try to solder that again Oh and some fun facts. I also record some part of this journey, my struggle, frustation and problems. I think I wanted to upload that with the submit build review video, if I am confident enough hehe
This is the kit that I got
This is me trying to solder the pcb
Screenshot 2026-01-26 at 08.51.48
Stay tuned!
1/30/2026 - Desoldering and Soldering againn
Okay guys so.. yea, after the last journal I desolder the PCB then wait for the flux.
After the flux came, I start to solderign it again.
I think the flux do make it easier but not as easy as I thought before.. Initially I thought that the flux can just making the soldering iron automatically stuck.. But in my case, no.
Well I don't know why, yes the flux do like become a liquid and fill up the holes, but when I apply the soldering iron there (with the solder it self heat up the pins), it actually wouldn't melt. I need to like directly touch the soldering iron to the solder (context: I had set it to 400°C). Then the soldering iron will perform like a blob. Then I guide it to the holes. After that, it somehow didnt go to the holes at once, like hydrophilic (is that the right term? ) yea like that.. and I need to push it further so that it can stuck to the holes.
And yeah.. it perform a big blob but.. the result turns out better than what I expected..
Front look
Back Look
Oh and perhaps if someone wanted to give me some suggestion, I am open to it.
Next, I wanted to figure out how can I place the battery and the remaining components