Make a Custom Mouse
Duplicate this document to get the official design files for the Bambu mouse kit.
Make sure to set the document units to mm!
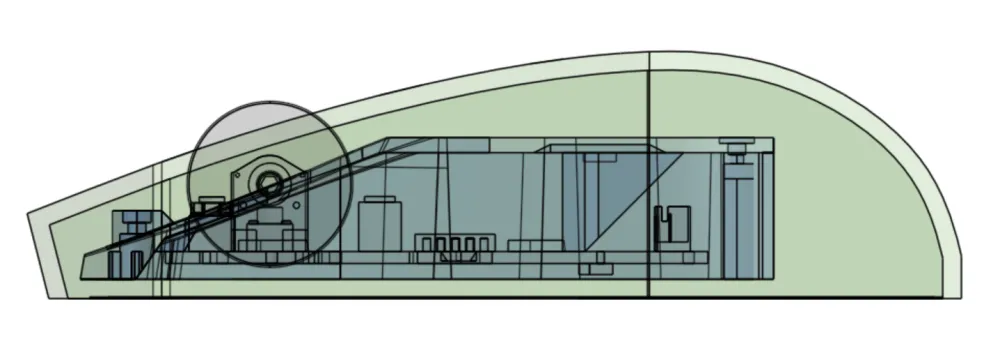
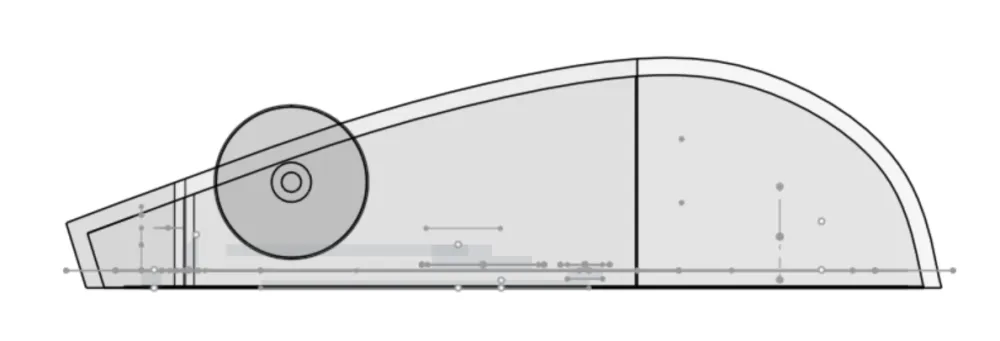
When you open your design, it should look like this:

Flip to the bottom of your base and start a new sketch. Make it look how you want your base to look.
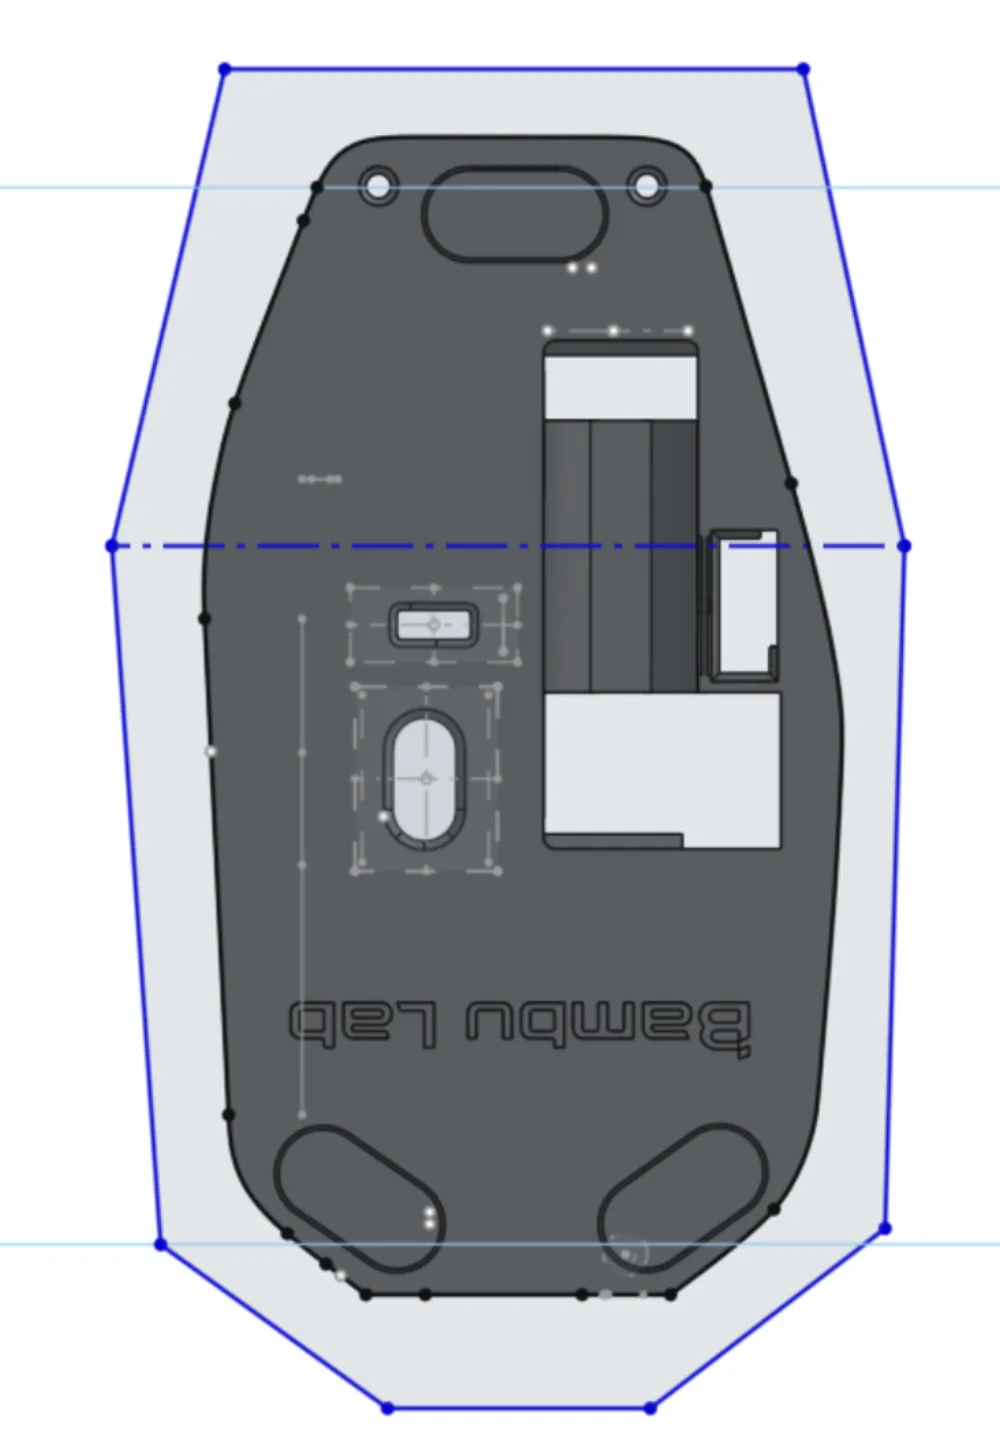
Make sure that your section turns dark gray. This means you created a closed shape and can perform 3D operations using that section.
Finish your sketch, then select the extrude tool:
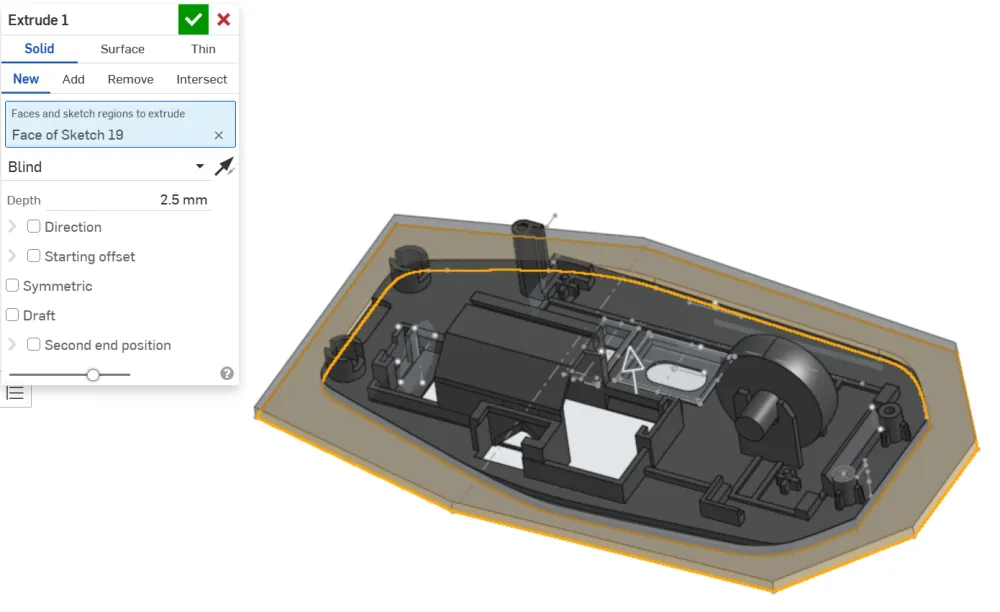
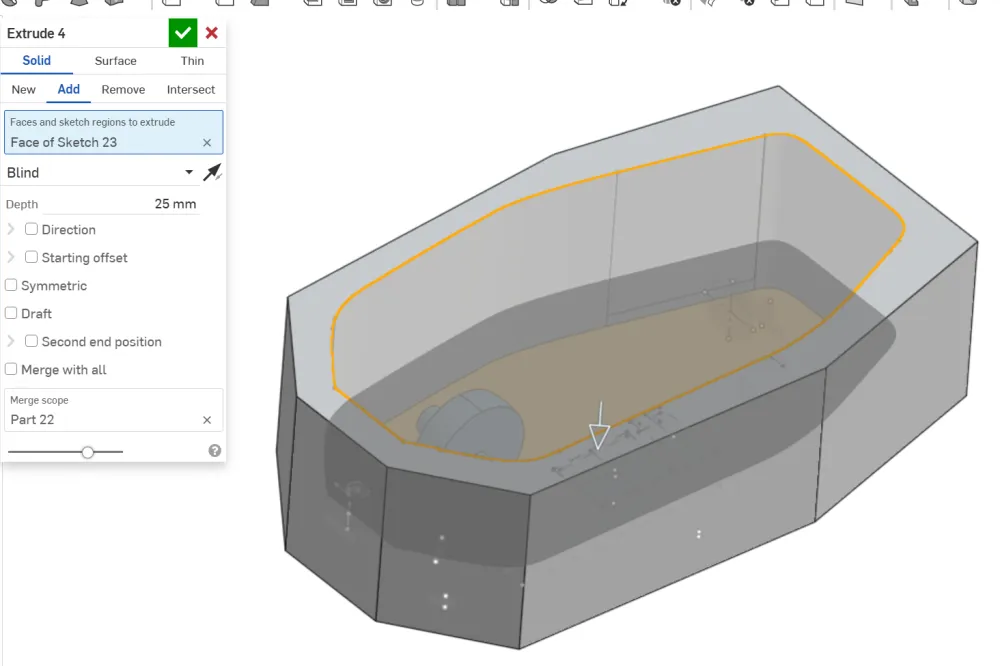
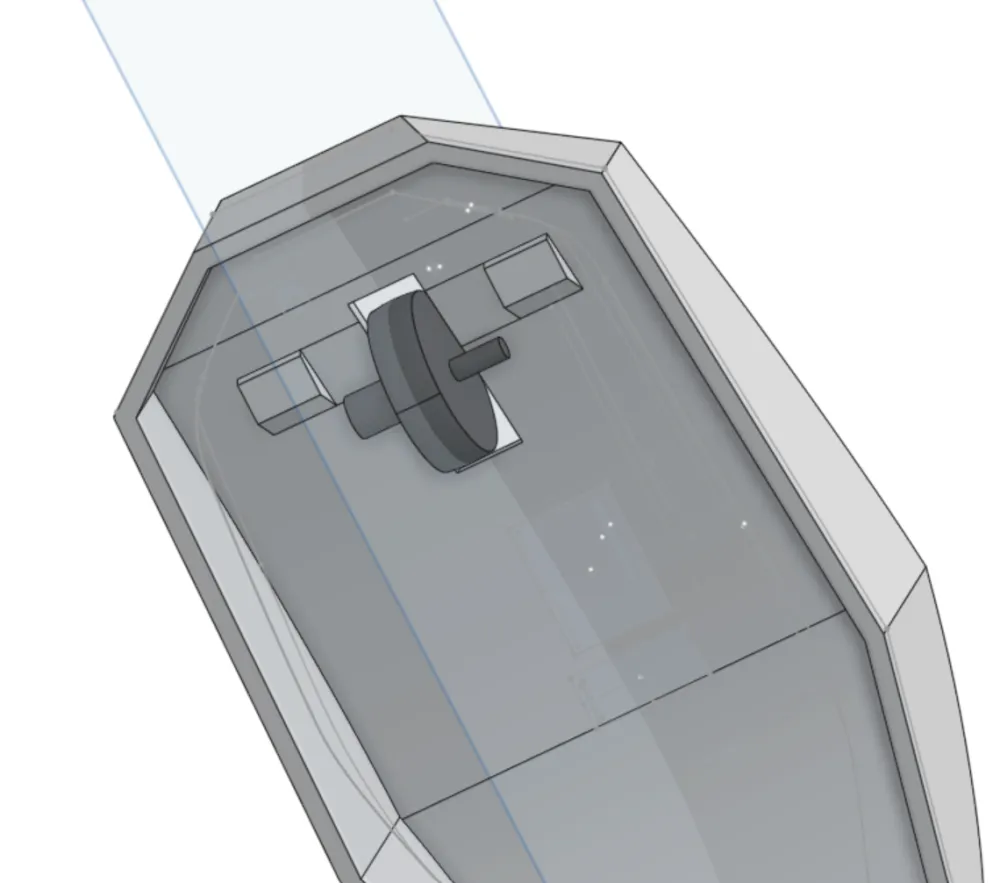
Your case should look like this now:
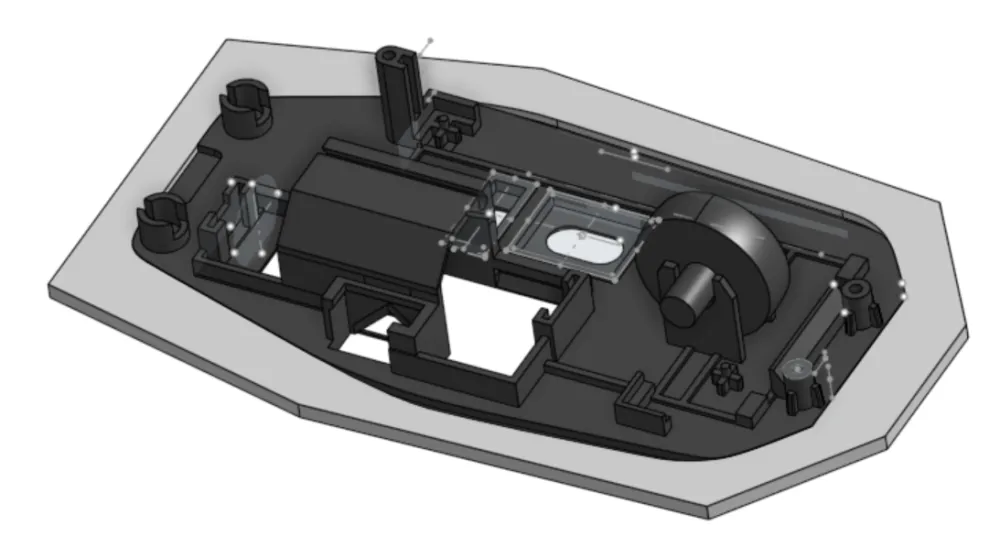
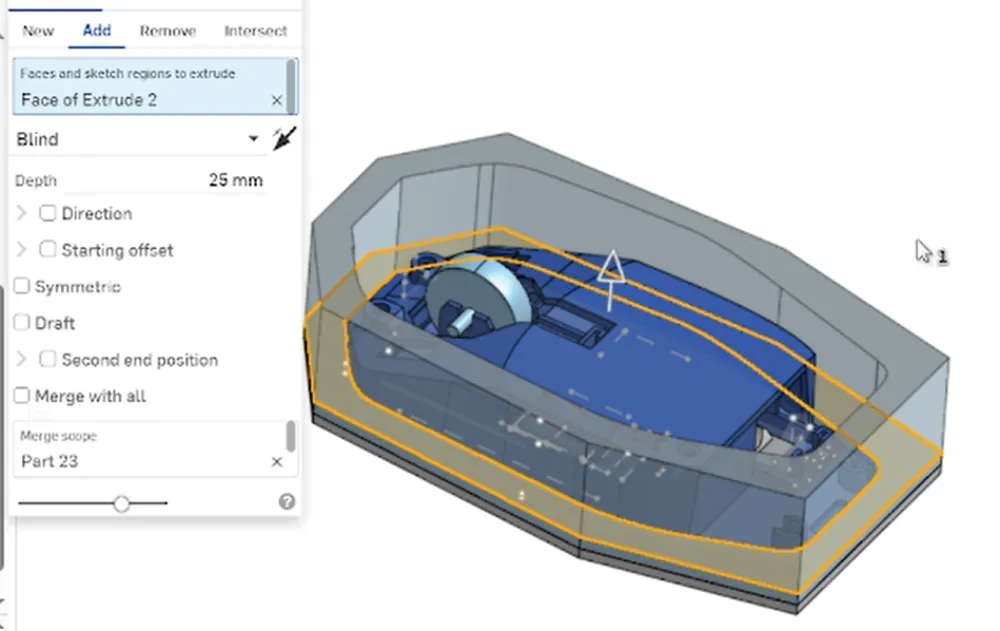
Select the top of your extrude:
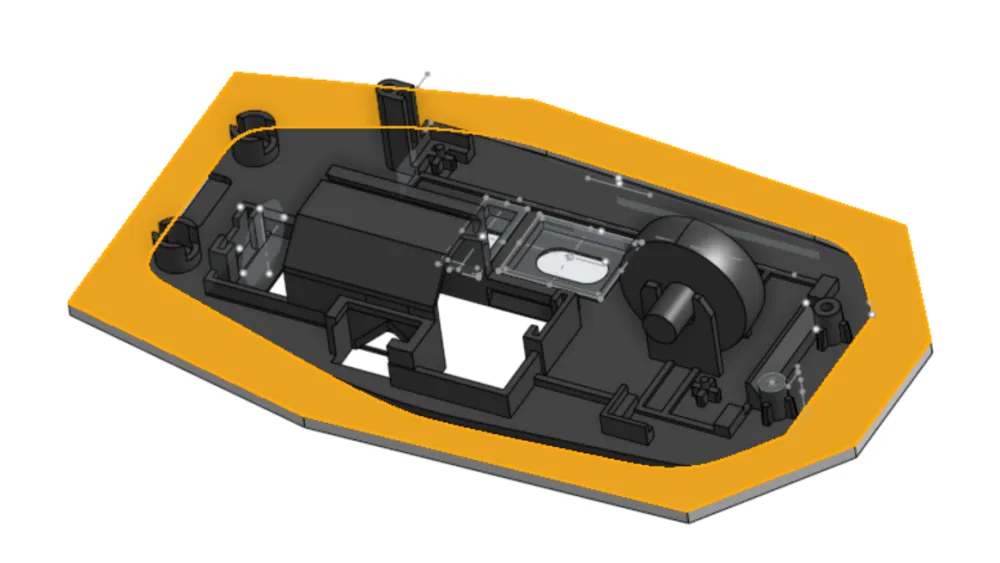
Extrude using add mode by ~25mm. This is roughly how tall you want the top of your mouse to be:
Select the inner area of your extrude:
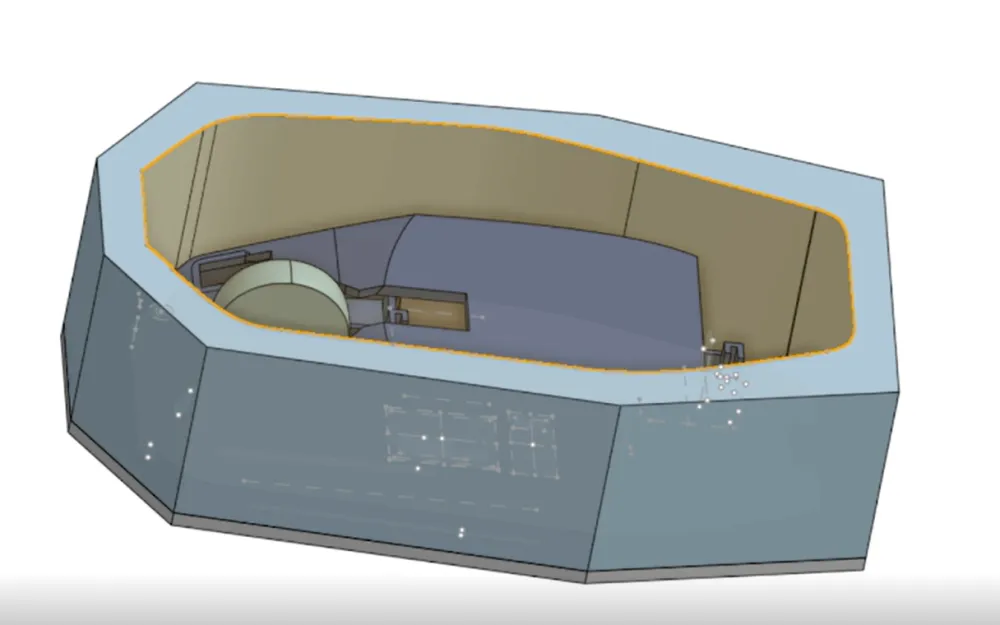
Extrude inwards by the same height you extruded outwards:
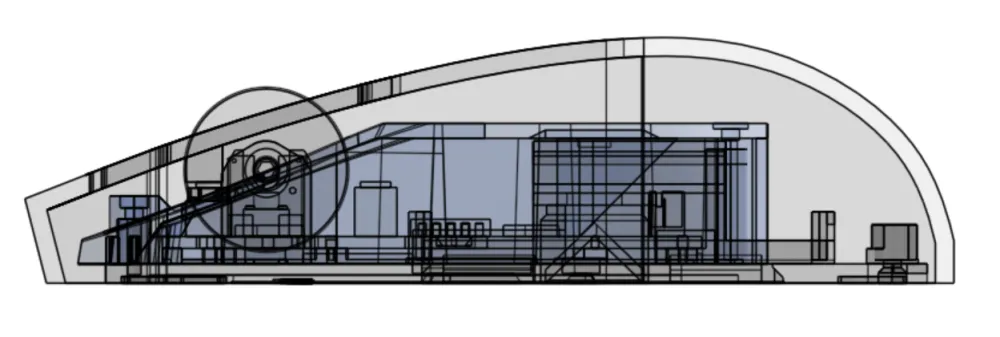
Using the view cube, view your mouse from the left or right side:
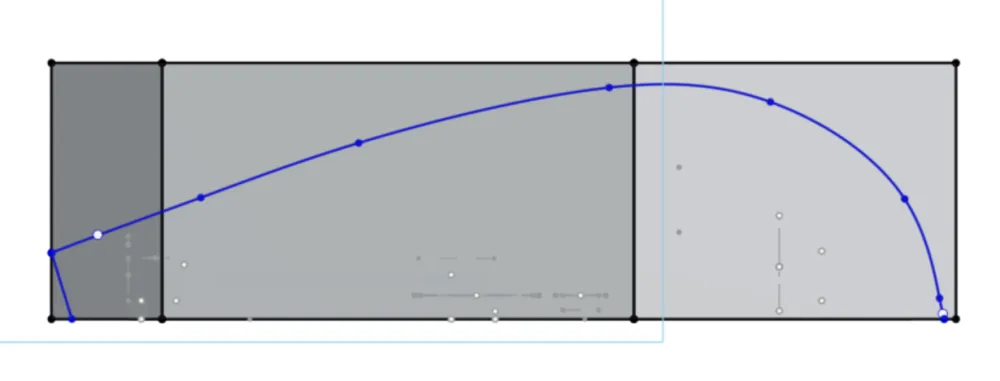
Start a new sketch on the right plane. Draw the horizontal profile you want:
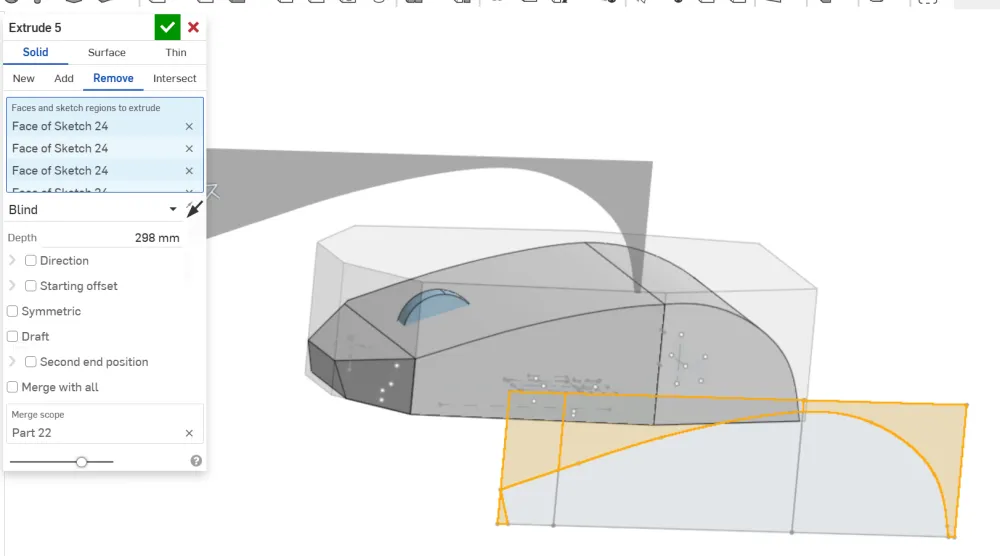
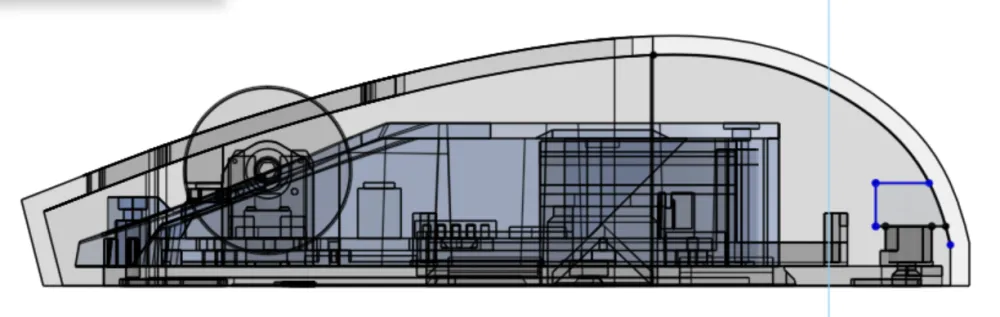
Use the extrude tool in remove mode to remove sections you don't want:
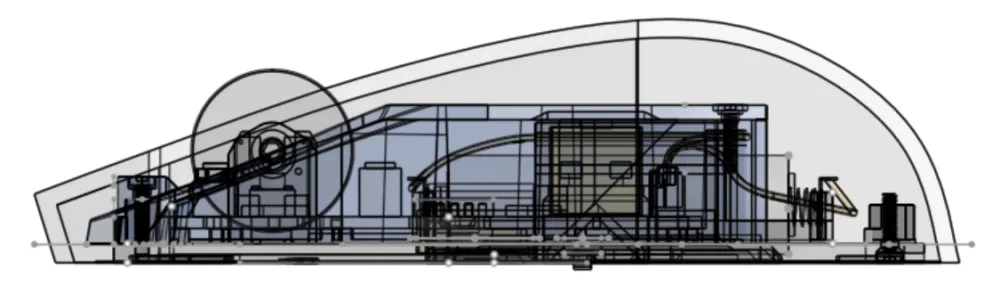
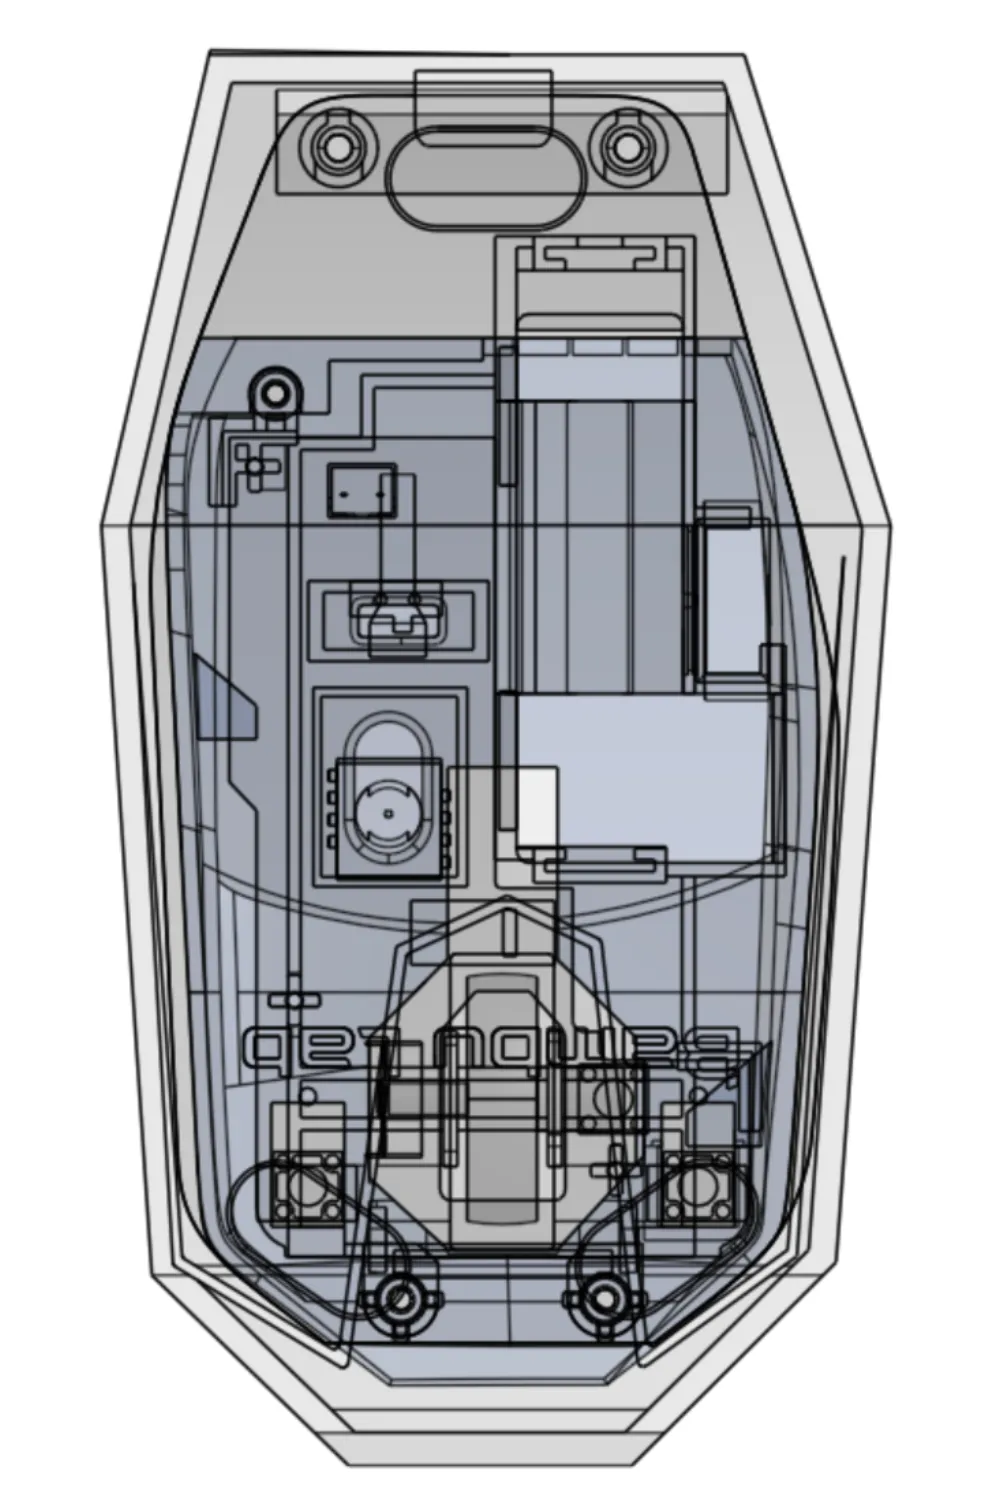
Change the view mode to translucent:

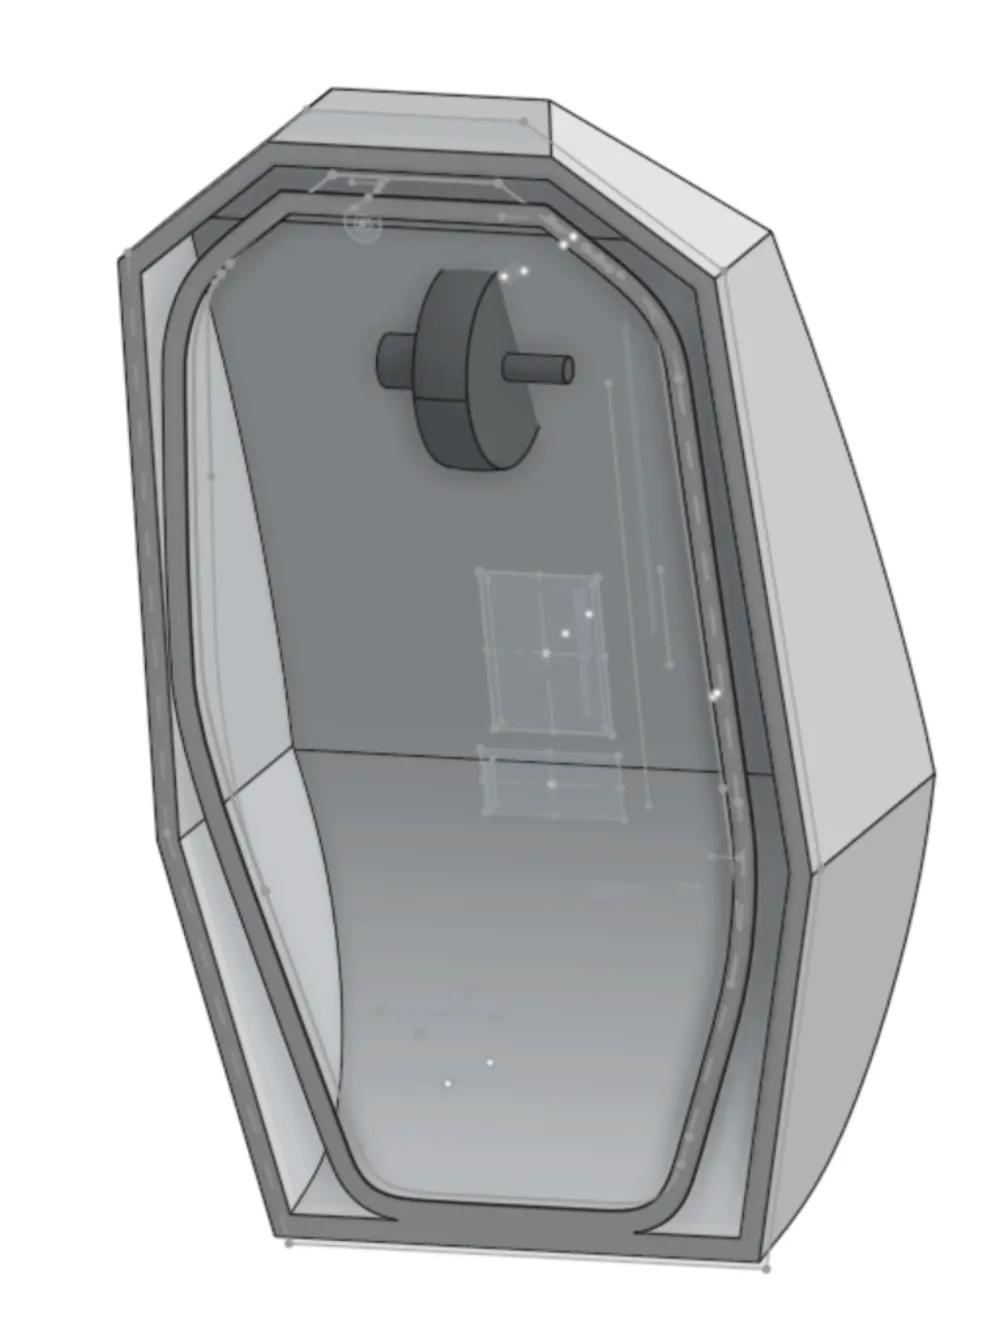
Your mouse should look something like this now:
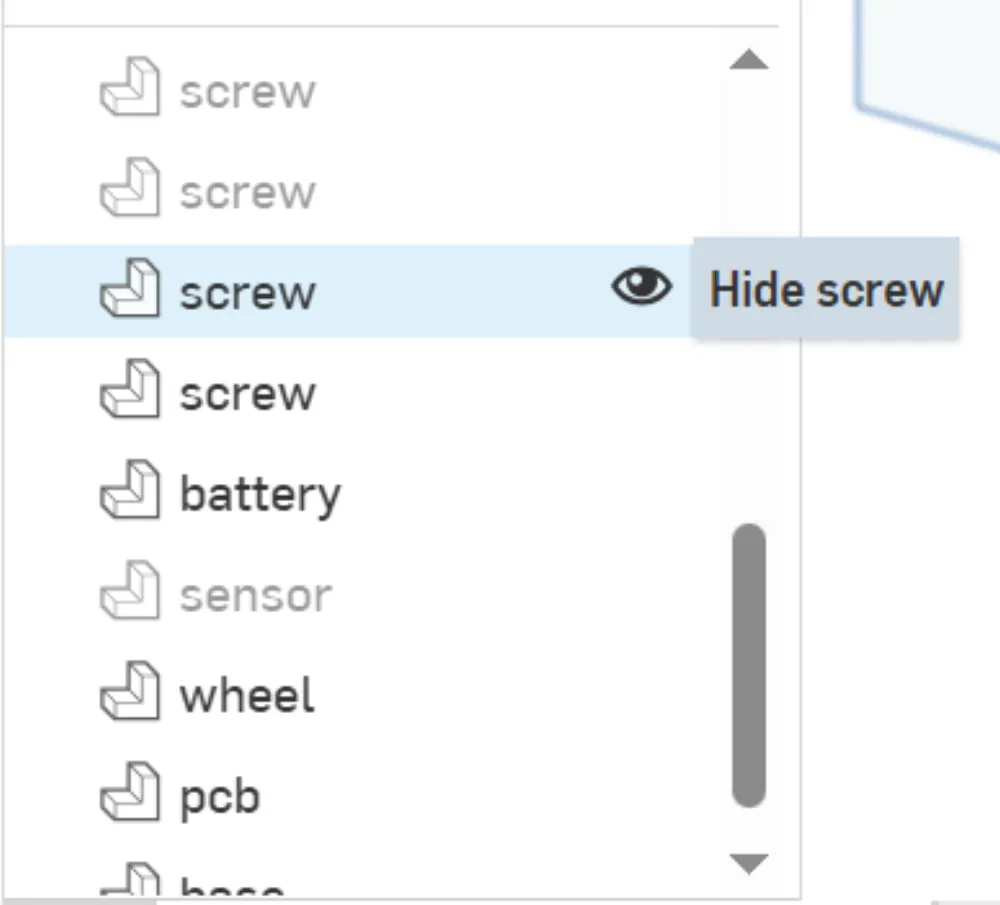
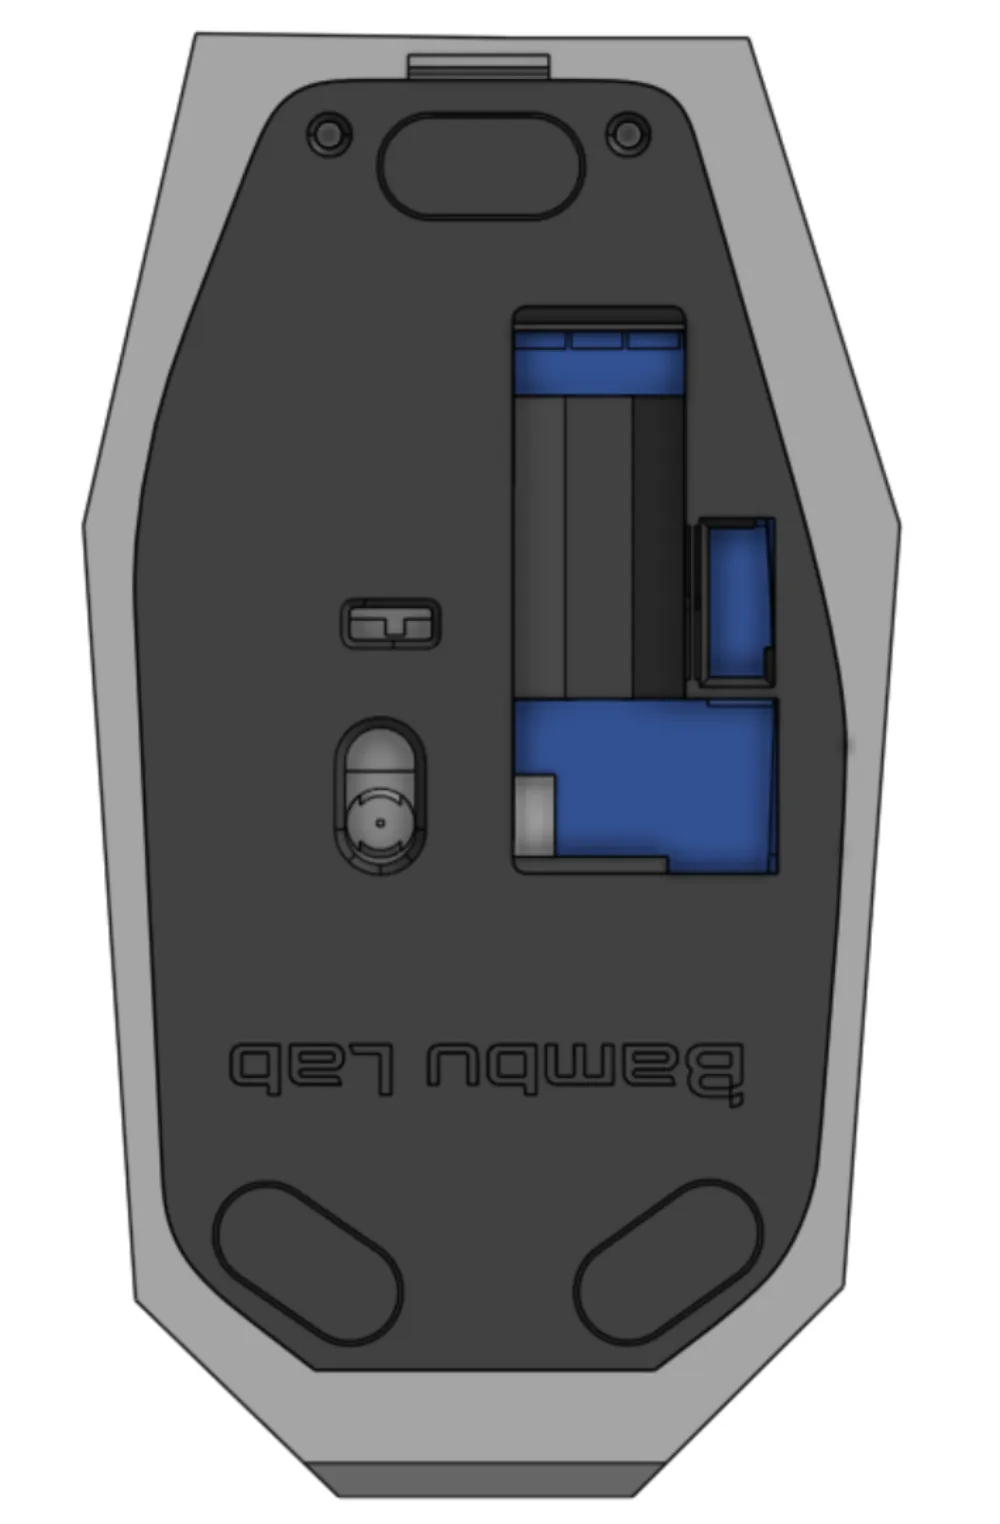
Hide all unnecessary parts except for mid, screw4, screw5, wheel, pcb, and base:
Your mouse should now look like this:
Make sure there is at least a 2mm gap between the edge of the blue block and your outline.
Use the view cube to return to 'shaded with edges' mode.
Head to the bottom of your mouse. Hide the mid and base. Use the shell tool on the bottom:
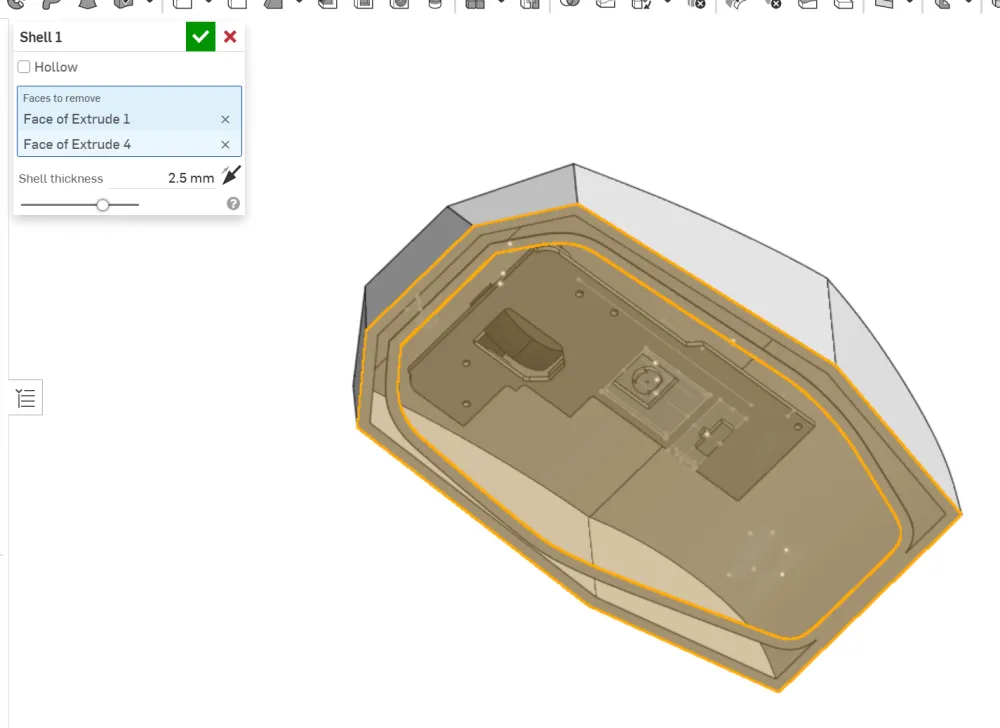
Your mouse should look like this now:
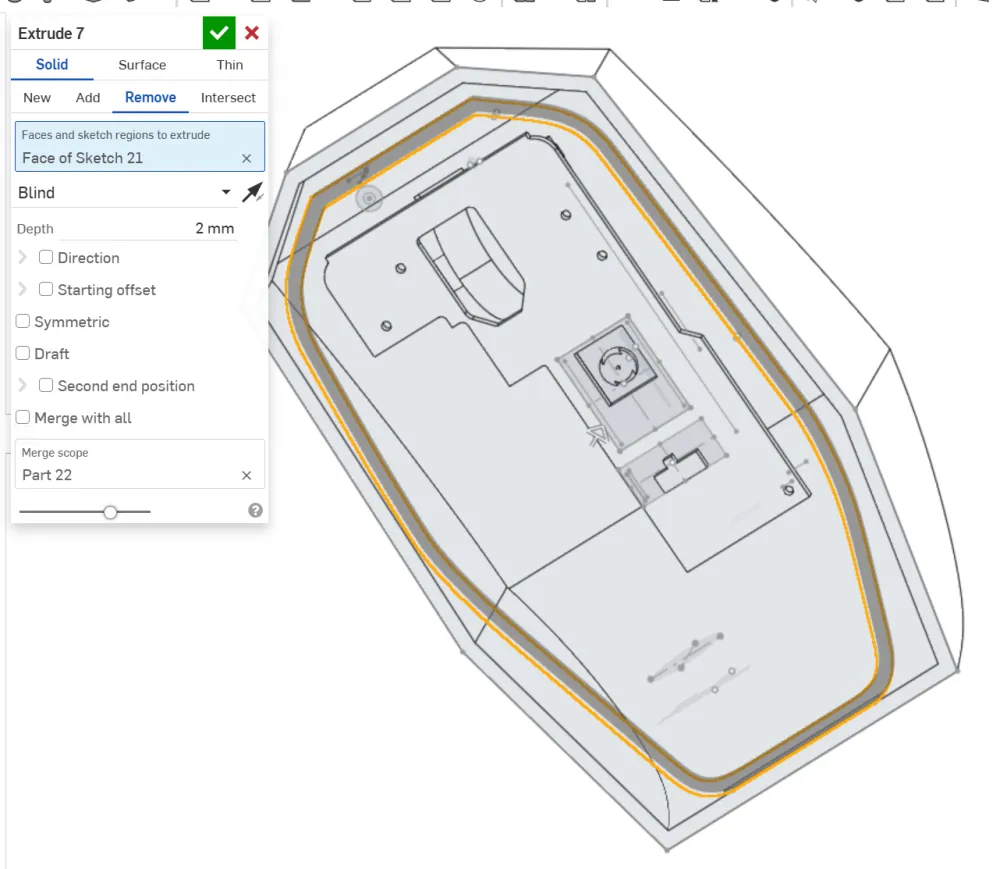
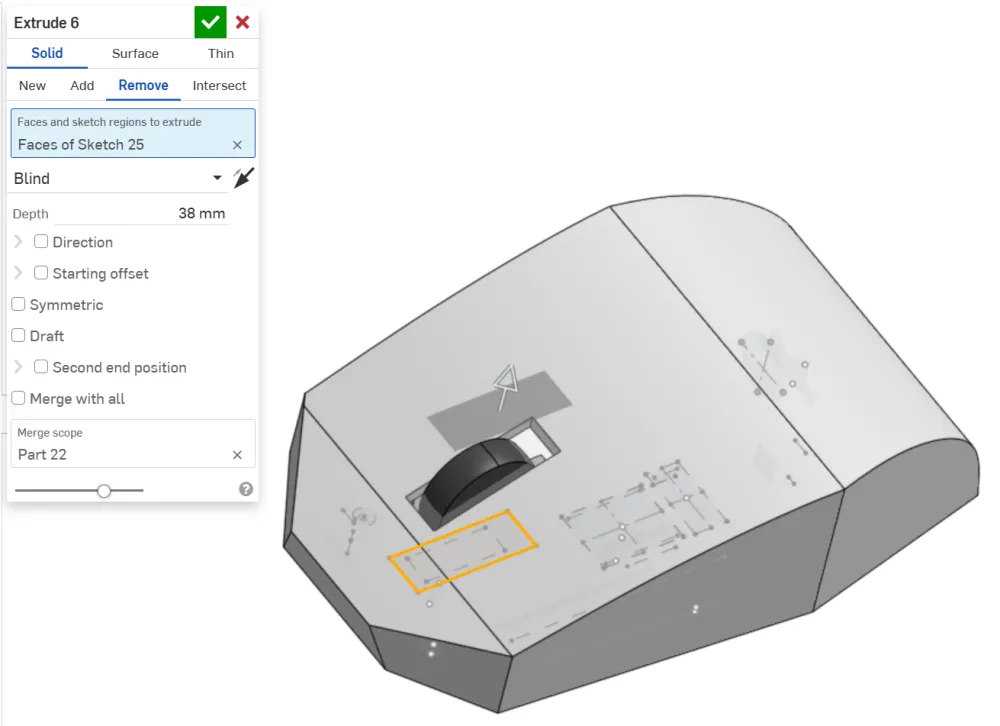
Remove any extra rings by extruding in remove mode by 2mm:
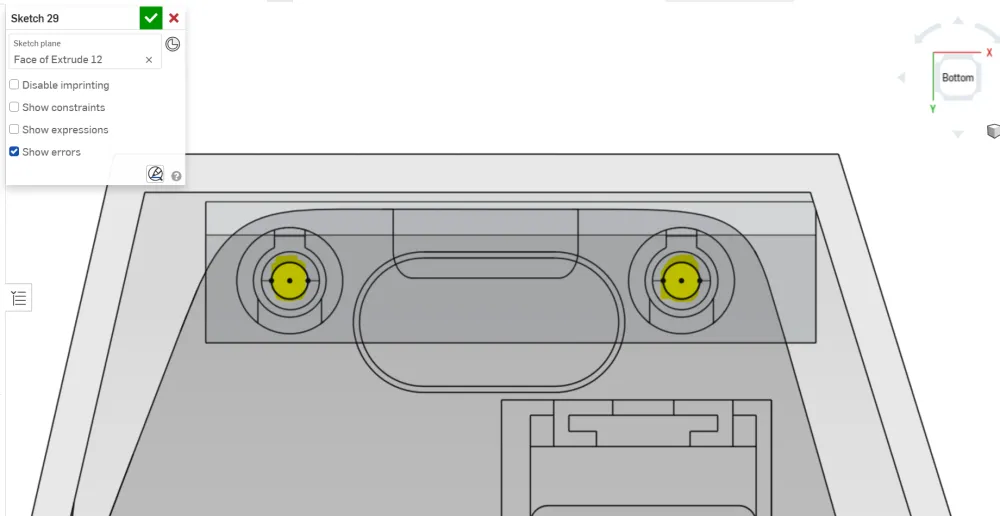
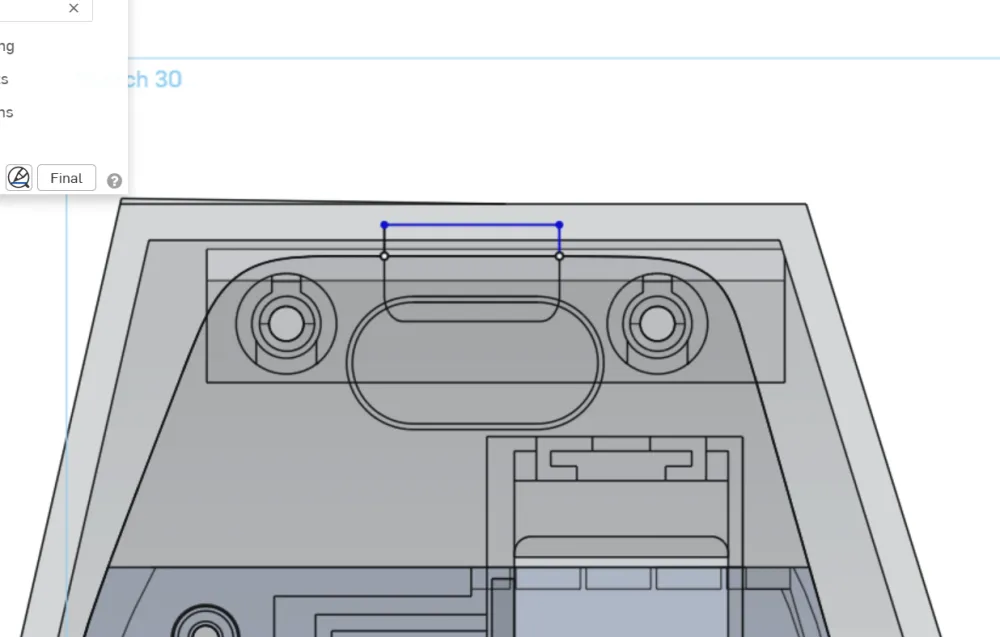
Click on the top face of the view cube to see your mouse from the top plane. Create a new sketch:
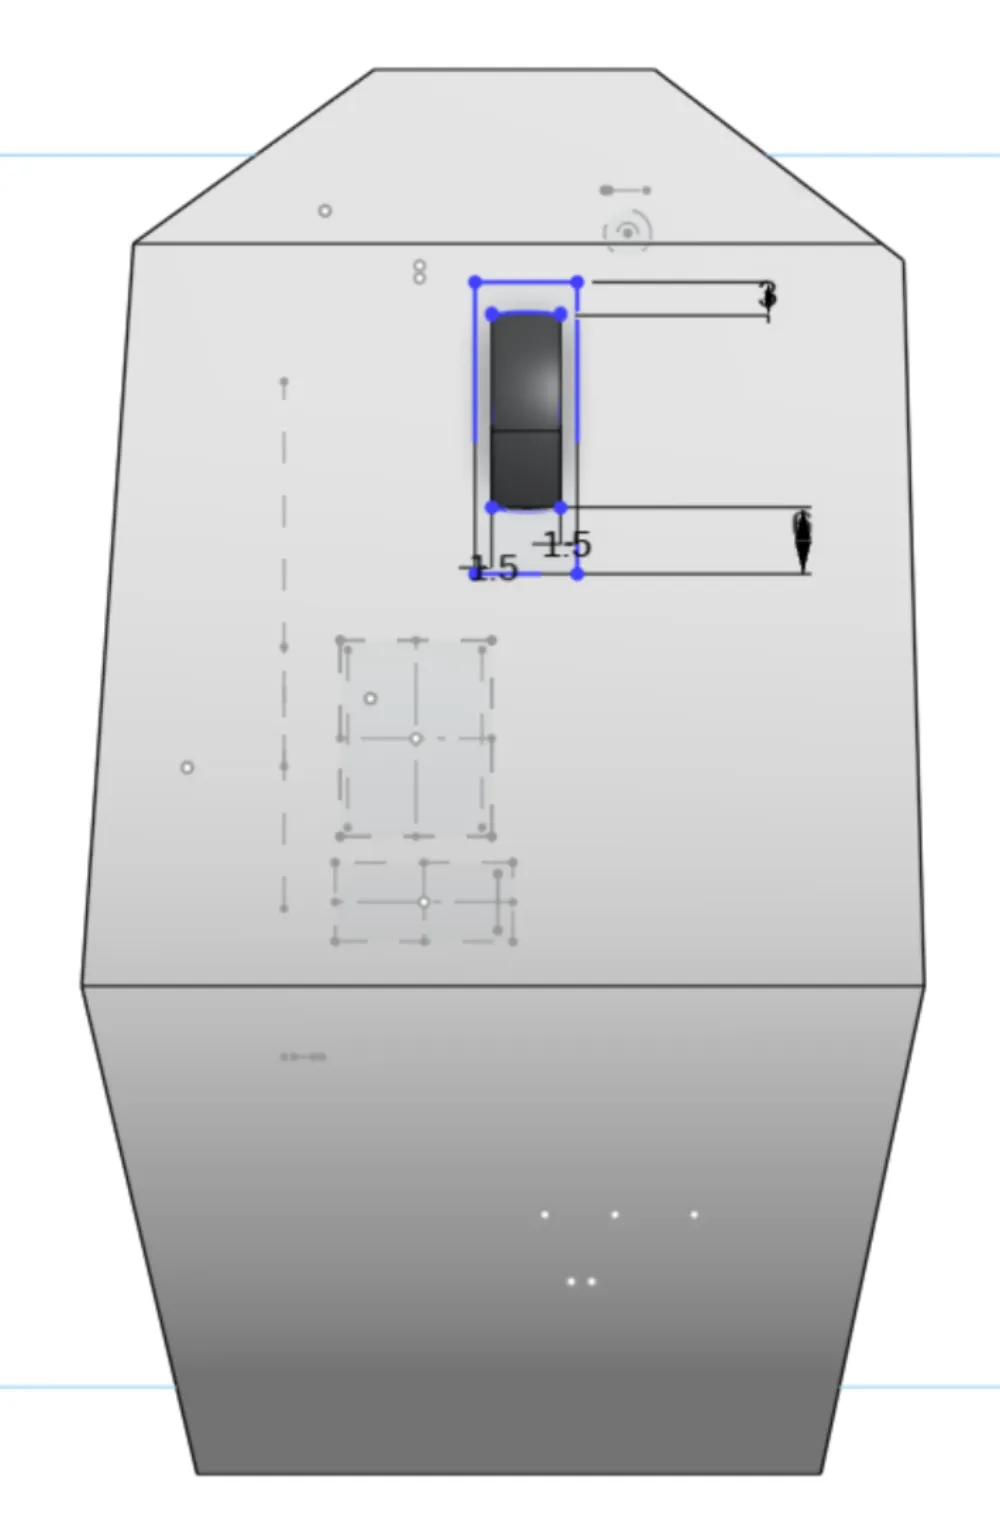
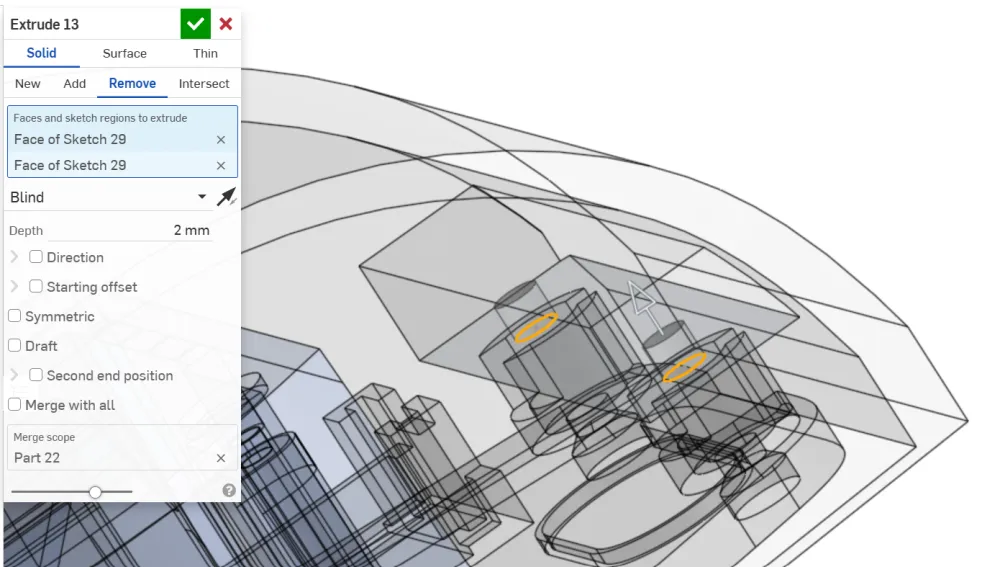
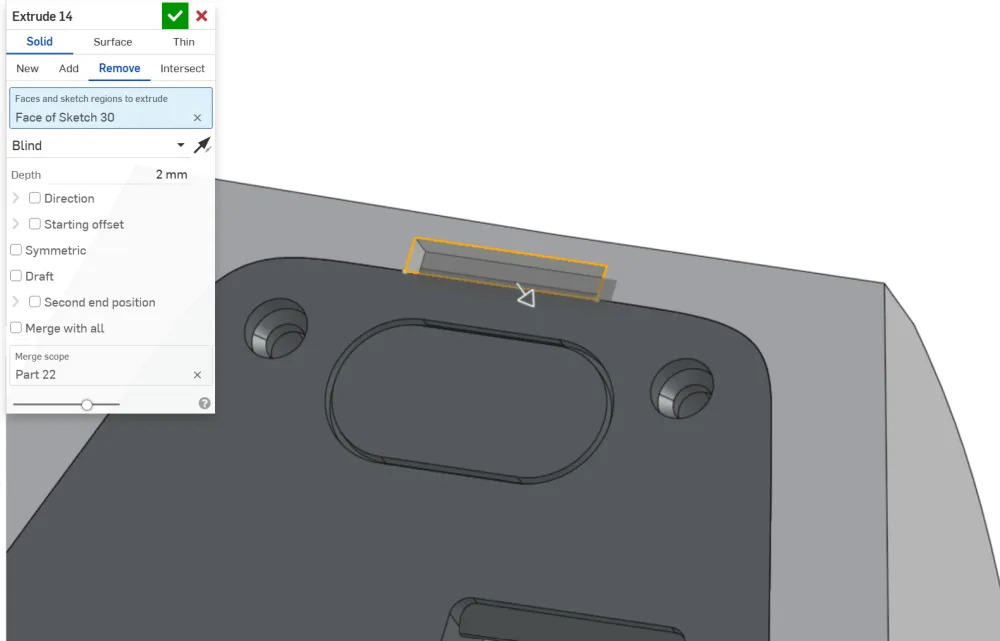
Finish your sketch and remove to create a through hole:
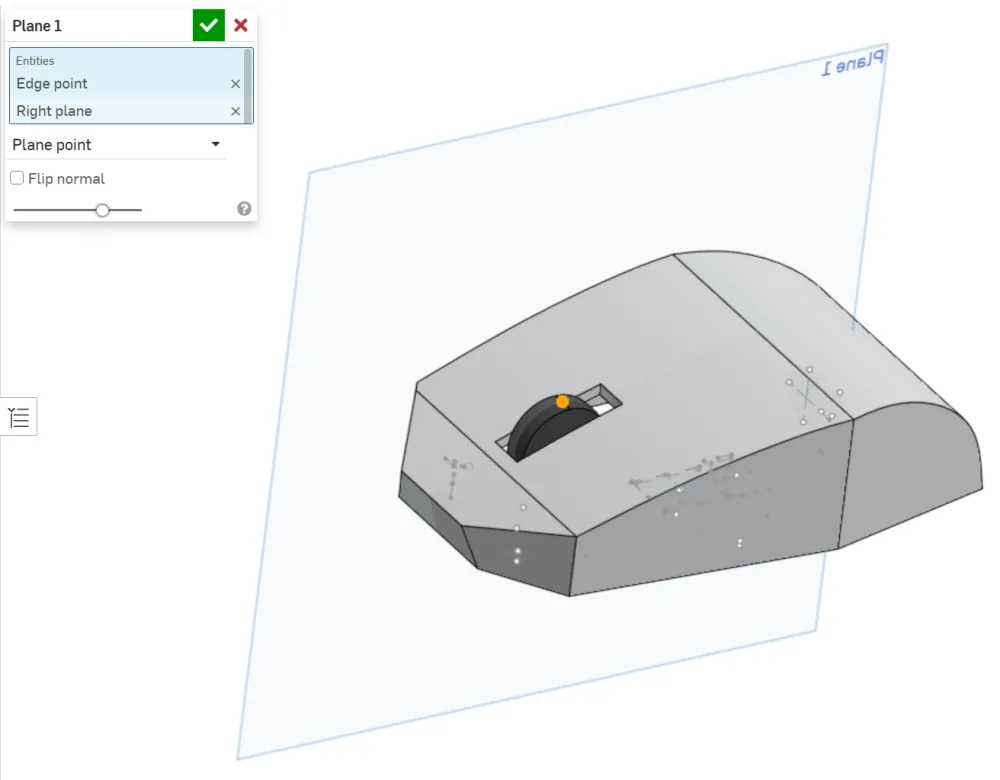
Using the plane tool in plane point mode, create a new plane at the center of the wheel:
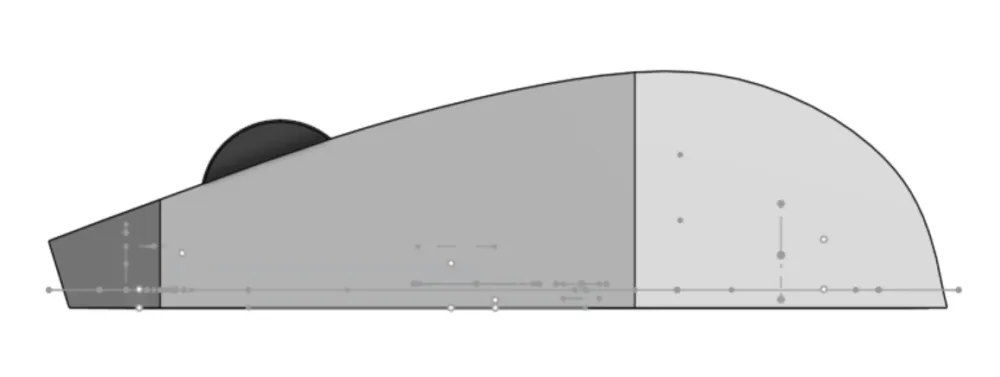
Start a new sketch on the new plane. Set your view as transparent:
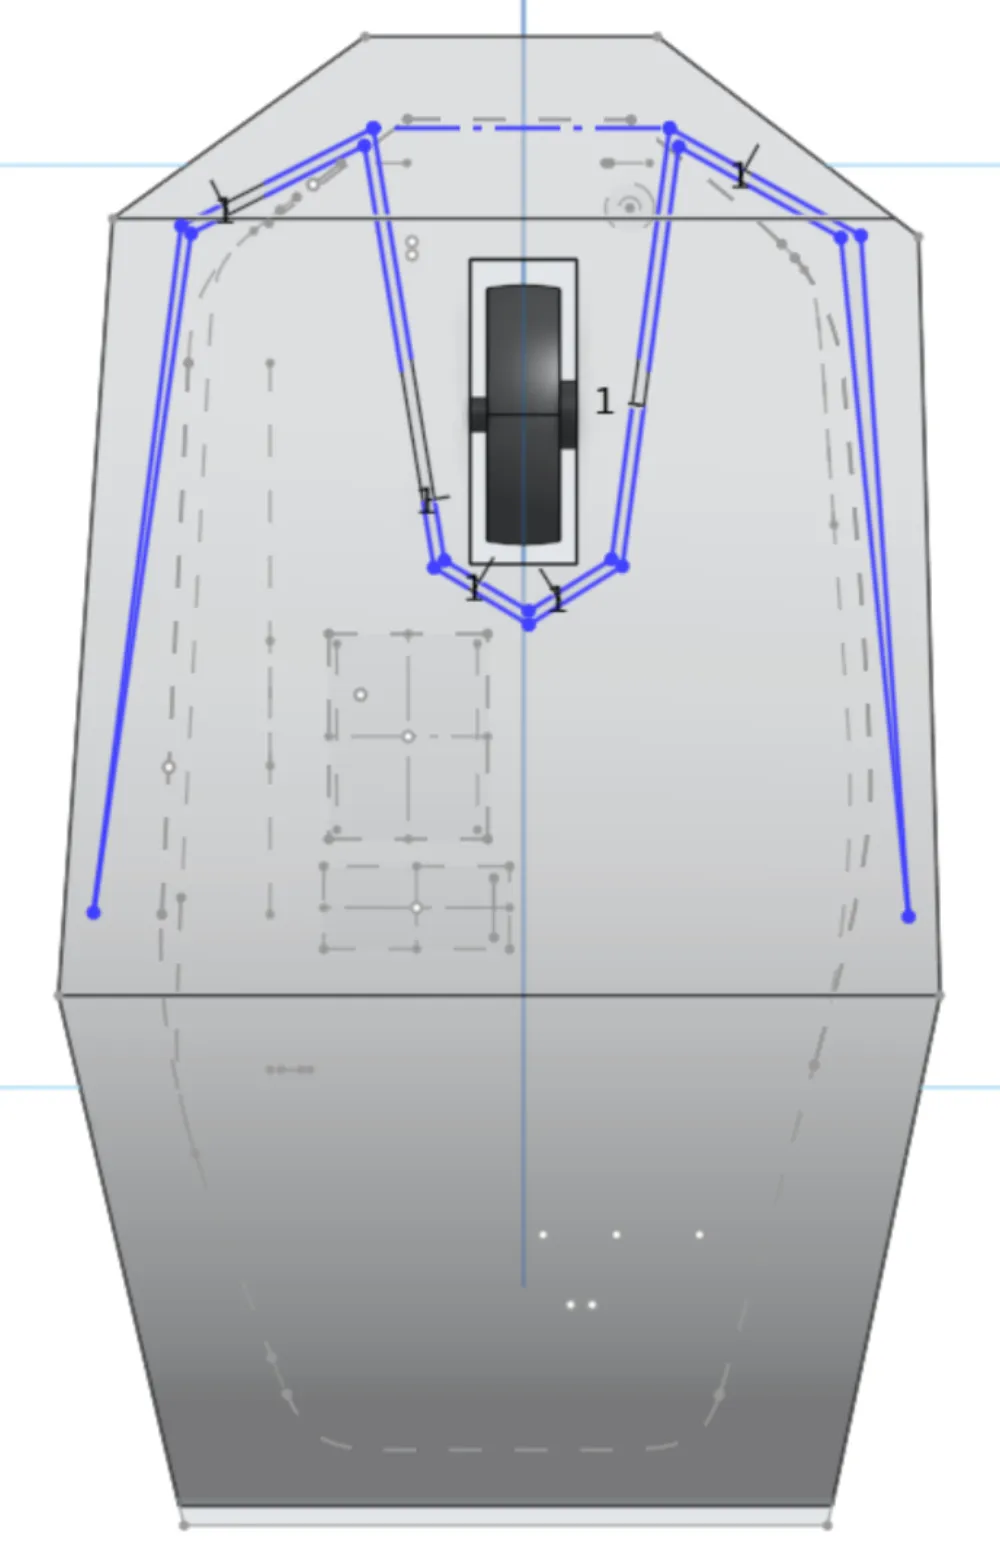
Draw a wedge that can press down on the buttons:
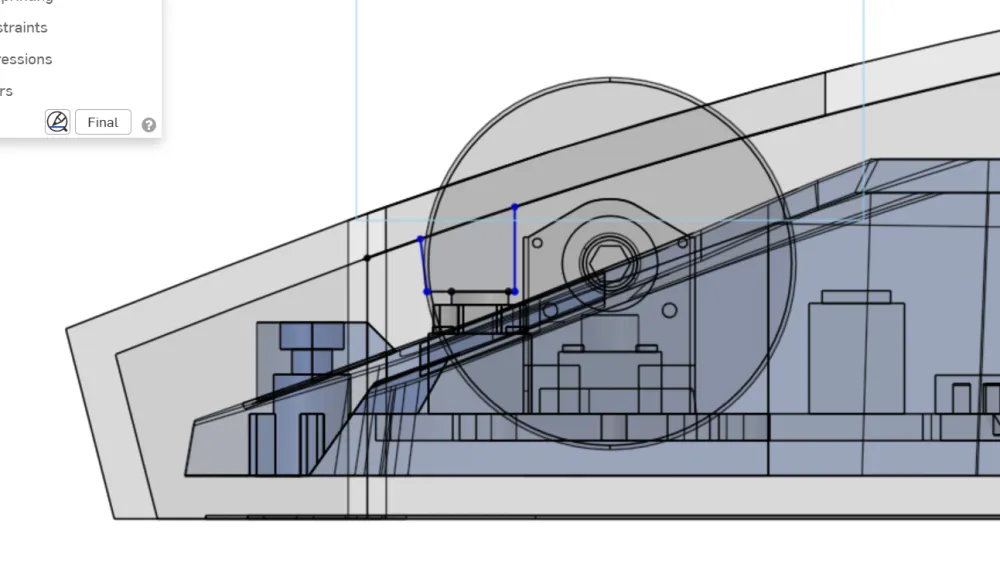
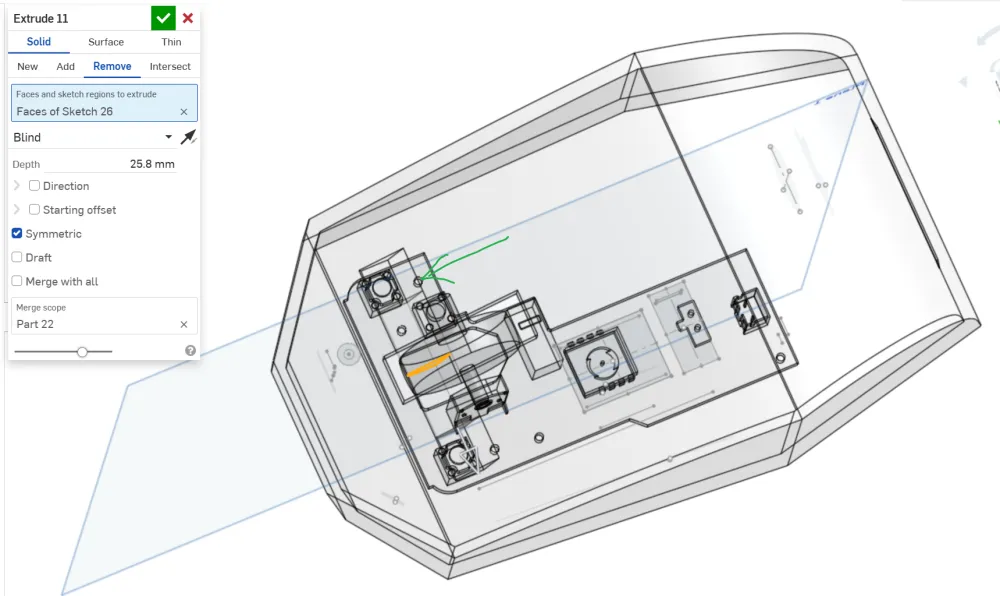
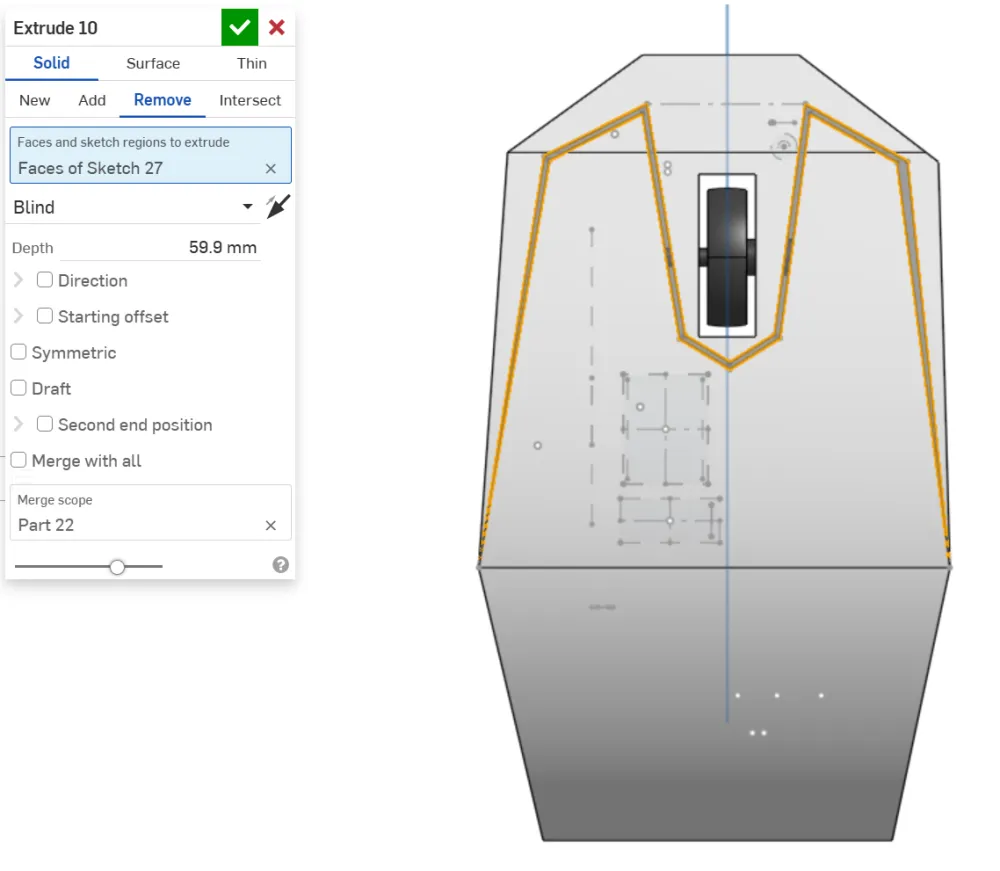
Extrude symmetrically by ~44mm to cover the buttons:

Remove symmetrically by ~26mm:
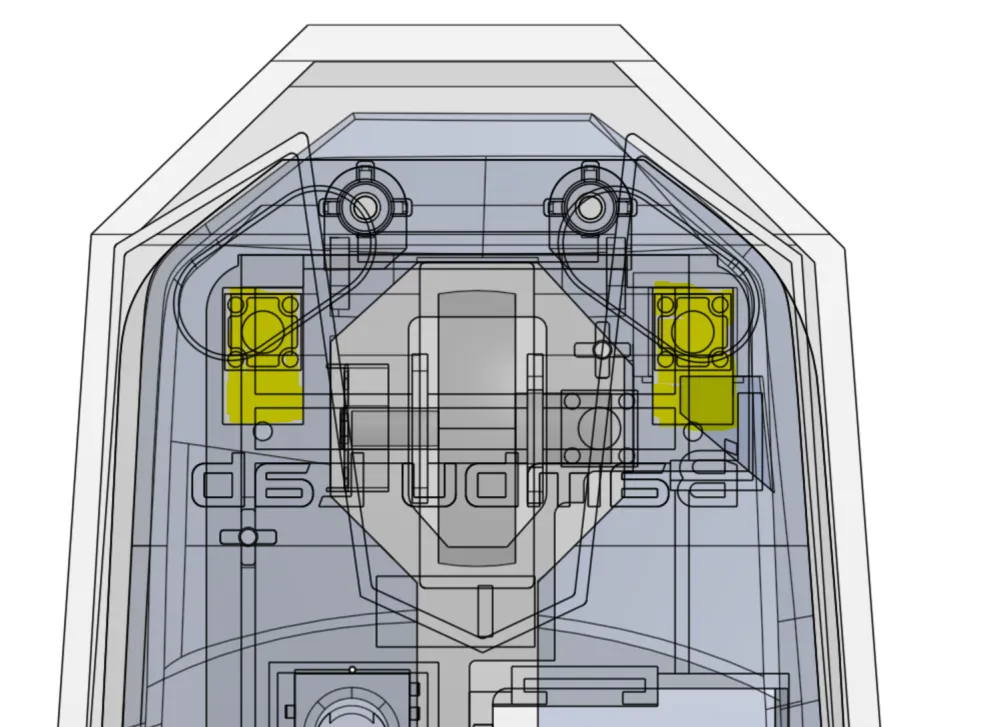
Ensure your wedges are within the yellow area:
Flip to the bottom of your mouse:
Start a new sketch on the top face for the clickers. Remove to form a through hole:
Go to the bottom and extrude the base by 2mm:

Hide the base to see the result:
Fillet edges by 0.5mm:

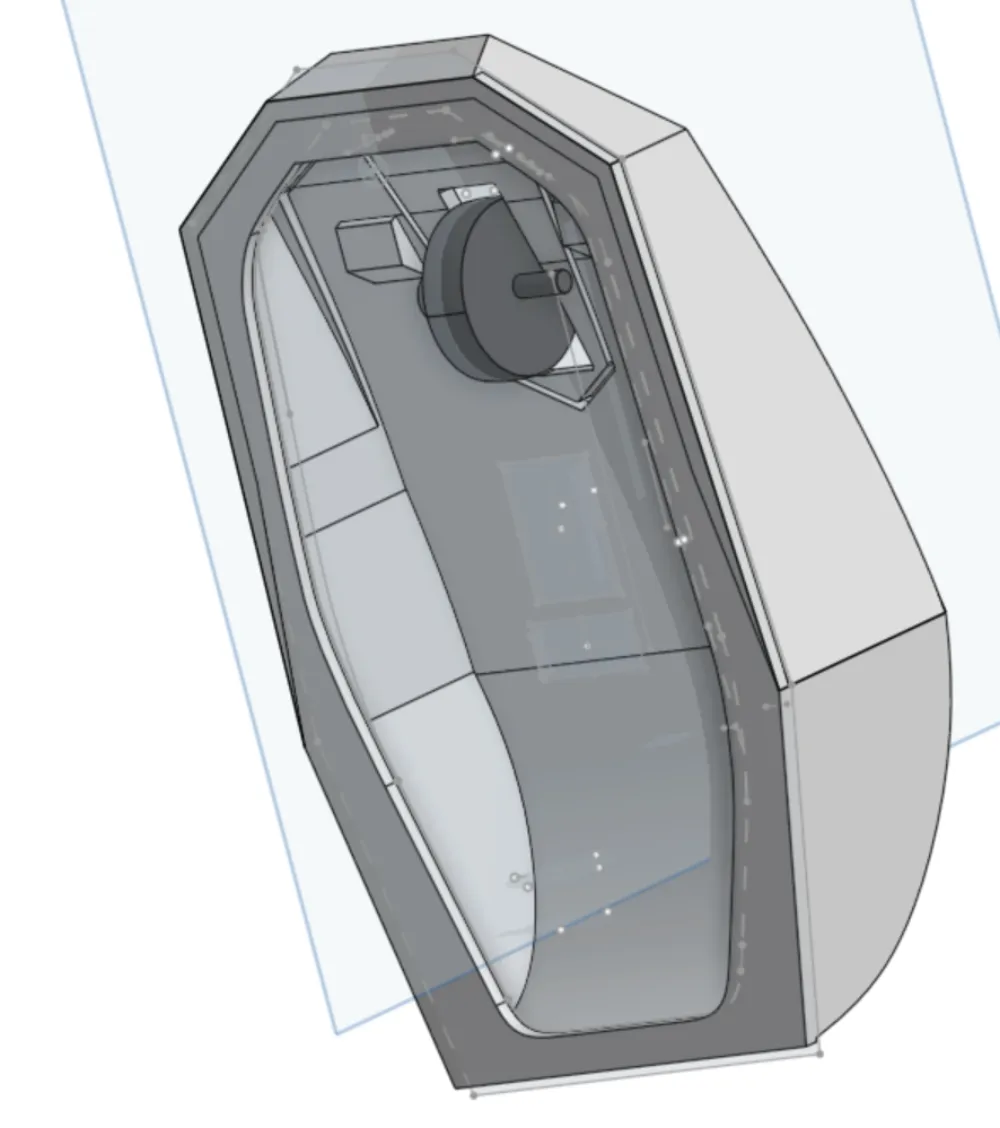
Go to the side view and set transparent mode:
Start a new sketch supporting the top of the base:
Extrude by ~40mm:

Go to the bottom and create screw holes. Remove by 2mm:
Add a space to grab the base after inserting it:
Create a new sketch on the bottom face:
Extrude by 2mm:
Yippee! Thanks for getting through the tutorial :D
Before submitting, review your design for possible issues (intersecting parts, disconnected parts, impossible overhangs, etc.).
Questions? Reach out to @idksarah in #squeak on Slack.